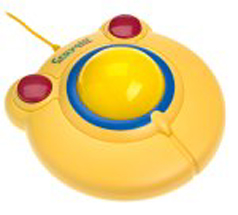
Crayola Kidsball
to Opti-PAC Crayola Kidsball
to Opti-PAC
For my rotating design to work, I wanted
to keep the number of cables coming out of the panels to a bare minimum.
The ideal method was to have one single USB cable that could feed a 4-port
USB hub inside the panel assembly. The one obstacle to this theory was
the Kidsball, which comes with a serial cable. The serial connector
wasn't going to fit thru the narrow wiring channel that runs to the back of
the cabinet. So I decided to try hacking the Kidsball so that it could
interface with my Opti-PAC board...
OPTICS
The problem is, the Opti-PAC requires
raw data directly from the optics of the device you're using, rather than
the encoded data sent out thru the serial cable. Kelsey at Oscar
Controls was able to help me with the electronic connections, which are
really pretty simple:
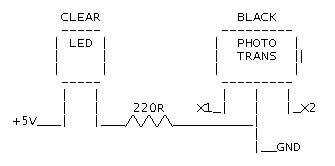
Optics schematic (courtesy Oscar
Controls)
The above schematic shows how the optics from a cheap mouse can be used to
send signals to the Opti-PAC, with the addition of a 220 ohm resistor. Fortunately, I had an old generic
mouse sitting around which gladly gave up its parts for the Kidsball.
I removed all the original components from the Kidsball circuit board, then
replaced the original LED and phototransistor with the cheap mouse
optics. This is necessary because the original Kidsball optics don't
send the correct signals required by the Opti-PAC.
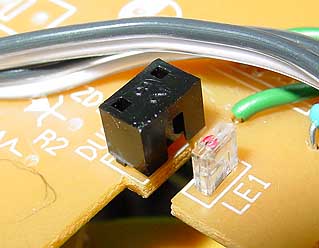
The new optics installed
Following Kelsey's schematic, I used
hook-up wires to jumper between the new components on the Kidsball PCB, and
to make the connections from the PCB to the Opti-PAC. Make sure you have the correct side of
the LED facing toward the sensor side of the phototransistor (the emitter
side of the LED usually has a small lens or blister). Just make note
of their positions before removing them from the mouse board and you should
be OK. And don't forget the resistors! You need one for each set
of optics (total 2). This method will reportedly work with
optics from common cheaper mice such as Belkin and Kensington brands.
According to Kelsey, if you measure the voltage between signal (X1, X2) and GND,
and it reads less than ~0.2V, then the current is "sinking" to ground. In this case, you must change the Opti-PAC polarity jumper to A/LO.
In my case, I did have to change the jumper to A/LO in order to work.
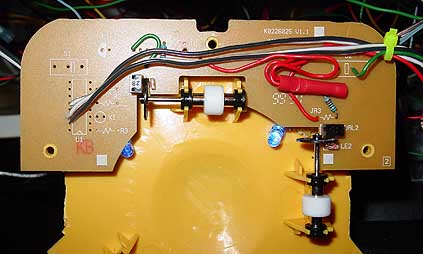
The Kidsball PCB with new optics and
wiring
ENCODER WHEELS
The next obstacle in connecting the
Kidsball to the Opti-PAC lies in the encoder wheels. Since most cheap
mice use encoders with larger "teeth", they most likely can not
detect the very fine teeth on the Kidsball encoder wheels. This causes
the mouse pointer to exhibit erratic, jerky movement, or no movement at
all. The solution is to either replace the encoder wheel with another
wheel of the same size but with fewer teeth (if you can find or make one),
or to modify the encoder wheels so that the teeth are thicker, with wider
spaces in between. I chose to modify the Kidsball encoders.
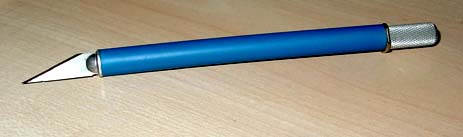
X-acto brand hobby knife
First, you need to cut away every third
tooth. To cut the teeth, you need an x-acto
knife. The blade must be a new, sharp blade or
you will mess up!
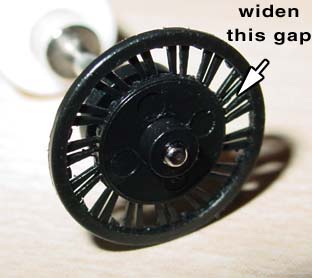
The encoder with every third tooth cut
Carefully cut every 3rd tooth as in this picture.
Cut by placing the tip of the blade near the end of a tooth (with the sharp
edge against the tooth to be cut), and carefully inserting the blade further
inbetween the teeth until it cuts the end off. Do this slowly and
carefully, don't rush or press too hard. Now cut the other end of the
same tooth. Skip 2 teeth and cut again. There will end up being
4 teeth together at the end, because of the odd number of teeth.
Carefully widen the gap between the 2 middle teeth so that light from
the optics can shine through. Do this by scraping away some of the
plastic on the inside edges of the 2 middle teeth. Careful!
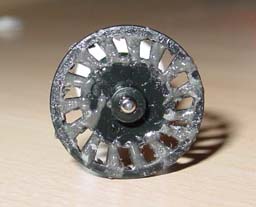
The encoder with gaps filled
Now you can fill the holes in the
leftover teeth with some fast drying 2-part epoxy filler, like JB
Kwik Weld. Use a flat toothpick to apply the filler between
the close-together teeth. Be careful to leave a gap when you get to
the 4 teeth together, if some filler gets in there, just scrape it out with
the toothpick. If it's a little messy, you can scrape away the excess
with the x-acto blade once it's all dry.
Now pop the encoders back into the
Kidsball frame and you should be ready to go!
|
| The
information on this site is for the purposes of education and
entertainment only. The owner of this site makes no warantees as to
the accuracy of the information, and takes no responsibility for any
damage or injury sustained due to the use of information herein. The
design of the Pac-Mamea cabinet and all photos, computer renderings,
drawings, schematics, and printed information relating to such are
Copyright © 2005 Robert Meyers. No ownership of other
copyrighted material found on this site is implied. |