Trigger Stick
rotation-restrictor Trigger Stick
rotation-restrictor
This is a modification I came up with, based on Oscar's trigger stick hack.
My mod keeps the stick from rotating freely and ending up facing backwards on your
control panel.
Here's what I did:
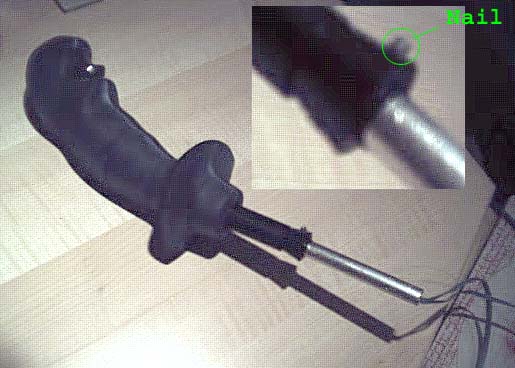
I cut off a nail to about 3/8"
long. Then I dremeled a slot into one end of the nail and bent out the resulting
tabs to either side. Then I drilled a hole the same size as the nail all the way
through the plastic piece that goes on the stick, inserted the nail from inside the
plastic piece, and the two bent tabs hold it from falling out the other side. (I
also put a drop of super glue on the sides of the nail first to help hold it still.)
Then drill a small hole though the metal shaft and use a screw or nail through the
other hole (in the back of the plastic piece) to connect it permanently to the shaft.
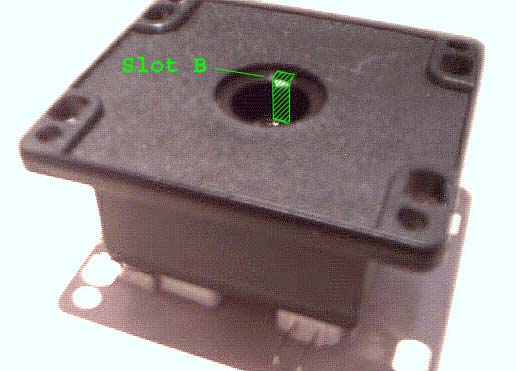
Next, using a hobby knife you just cut a slot
about 1/8" wide into one side of the tube on the top of the joystick base that the
joystick shaft goes into. (You might want to take out the mainspring from the base
before you do this) Make sure to cut all the way down, but not into, the floor of
this cavity. You'll also want to cut away a little on the 'shelf' around the
entrance (as shown) so that the nail can enter the slot when you insert the joystick
shaft.
Then just insert nail A into slot B! You may need to cut or file down the nail a
little if it rubs the mainspring when you move the joystick around. The stick should
still have full freedom of motion, but it shouldn't rotate more than 1/16" in either
direction.
BTW, for the shaft I used a thick aluminum tube that I bought at a hobby shop, instead of
the nutdriver shaft Oscar used. These come about a foot long, so you can easily cut
it to whatever length you need. I also drilled 2 holes through the aluminum that fit
perfectly with the screw posts inside the grip, for extra strength. Instead of using
the original e-ring to hold it to the base, I used a drill depth guide that is basically a
metal ring with a small hex-screw in the side.
Good Luck!
|
| The
information on this site is for the purposes of education and
entertainment only. The owner of this site makes no warantees as to
the accuracy of the information, and takes no responsibility for any
damage or injury sustained due to the use of information herein. The
design of the Pac-Mamea cabinet and all photos, computer renderings,
drawings, schematics, and printed information relating to such are
Copyright © 2005 Robert Meyers. No ownership of other
copyrighted material found on this site is implied. |