Using ADF Files
The Amiga being a computer primarily used floppy disks to store it' s data on. All games and applications were also supplied on floppy disk (often several) but there is a problem. The Amiga used special disks that aren't compatible with PC drives therefore for WinUAE to support floppies they needed to be converted into a file format.
ADF files are copies of Amiga disks in a file and are always 880k which is the size of Amiga disks. When you download a program from the internet it will normally be stored as an ADF file, however there are two other file formats that you might get which are ADZ and DMS. An ADZ file is a compressed ADF file using a program called GZip. This can squish the ADF file by up to 50% therefore saving alot of space. DMS files are covered on the Using DMS page.
How to use an ADF file
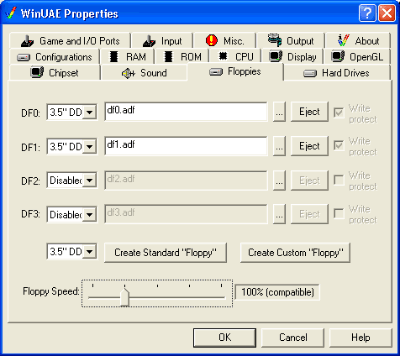
You can use an ADF file either before or during emulation. If you are still at the main options screen click "Floppies" to enter the ADF screen. If you are already runing WinUAE press F12 to bring up the options menu and then press the "Floppies" tab. You will see this screen...

OK the fisrt thing you can see is that WinUAE supports up to 4 drives at a time. This is very useful as some Amiga games can come on 10+ disks and thats a hell of alot of disk swapping. Each of the drives is marked "DF..." and they will appear under the same name when running WinUAE.
Next to the drive name you can select what kind of drive to emulate. The Amiga traditionally had a 3.5 inch double density drive which could store 880kb of data. As time progressed high density drives came out which supported twice the capacity or 1760kb of data. WinUAE also supports a 5.25 single density drive (440kb) for maximum compatibility but as far as I recall the Amiga never had one by default.
Next to the drive select there is a text box. This shows the file name of the adf disk in the "drive". The button with "..." opens a file window which lets you select the adf file. The "Eject" button will remove the adf file from the "drive".
As WinUAE treats adf files exactly the way the Amiga treats a disk you may want to protect the data you have saved. There is a tick box next to the "Eject" button that lets you write enable/protect you adf disk.
At the bottom you can see a slider for the floppy's speed. As WinUAE only emulates a floppy drive you can speed up the loading of games and data by moving the slider. If you start getting problems move it back to 100% as the disk will run exaclty the same as an Amiga.
To use an adf file press the "..." button next to the drive you want and select the adf disk you want to use. Press OK and you'll now see it in the text box. If you are running WinUAE then close the config window and the disk will automatically be recognized. If you haven't started WinUAE then when you do, if the disk is bootable, it will automatically start loading.
Creating An ADF File
Under the disk selection area the are a couple of buttons that will create blank floppy disks. The first box will let you select the type of disk to create. The "Create Standard Floppy" button will make a standard Amiga disk which is already formatted.
The "Create Custom Floppy" will make completely blank disks which are mainly used for save game disks.
As you click one of the buttons a file window will open and lets you type the adf filename of the disk. This has no reflection of the name of the disk in WinUAE as it will always be called the name you enter when you format it. Type in a name and press OK and your ADF disk is created.
Formatting An ADF File
Like the PC, the Amiga needs to prepare it' s disks for writing data on to. WinUAE will do this for you when you create the disk but if you want to erase the disk you need to know how.
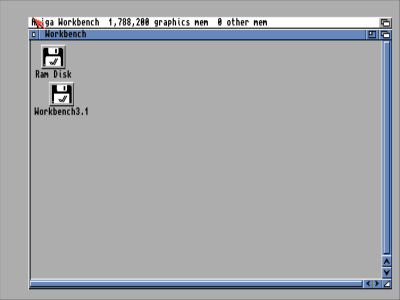
To format a disk you need to open up the Amiga operating system called Workbench. You need to get this from the net if you haven't already done so. Select your Workbench adf file and start WinUAE. Once loaded you see a screen like this...
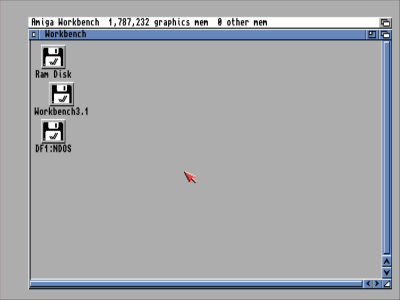
Press F12 to open the config screen, go to Floppies and in DF1 select the adf file you want to format. and press OK to return to WinUAE. You'll now see this...
Click the new disk once and move the mouse to the top of the screen. Now press the right mouse button and a menu will appear like this...
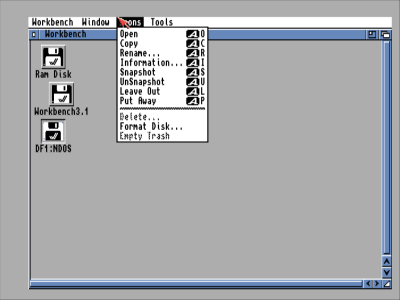
Move over the "Icons" menu then down and select "Format Disk...". This window will open...
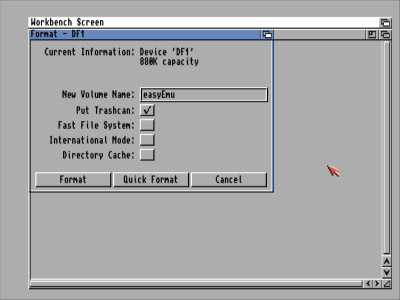
This is the Amiga's disk formatter. The volume name is the name you want to give the disk. This does not affect your adf's filename. The buttons below are addition features used for performance or compatability so are more for expert users. All you need to do is put in a volume name and press format. If you are just wiping an an existing disk then you can quick format it. Once done you'll see something like this...
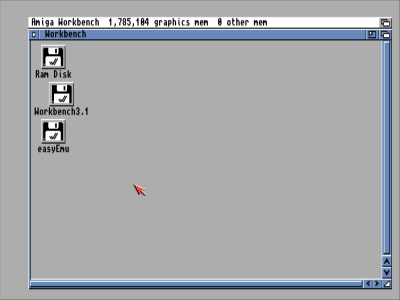
Thats it all done.
Saving Some Space
An adf file is always either 880kb or 1760kb but as I said before, WinUAE also supports the compressed adf format, adz. To make an adz file you need a program called GZip to compress the file. Although in the latest version of WinUAE it also supports zip files which are far easier to make and have better compression rates. You can typically save 50-60% of disk space using Winzip.