
The following will detail the
conversion/restoration of this cabinet.
(Lotsa pictures,
slow loadin)
BACK
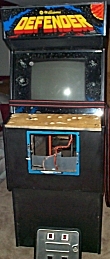 |
Well, there she is, my latest
toy. This one came almost complete. The control panel
needs an overlay, and a run through the planer, the controls are
missing, and the sideart is painted over with extremely thick
paint, but I really got a steal on this one. My plan is to
restore the sideart, order a nice overlay, and see about getting
a boardset for this one. |

PERCENT COMPLETE |
|
|
Sides are at least
nicely painted (grrr). Since I can't stand to think of a
vintage cab with good artwork simply hiding under layers of
thick black paint, I'll be doing my best to strip and possibly
touch up the artwork...if it's even there!! |
 |
|
|
ONE...TWO...THREE... STRIP!!!
|
|
|
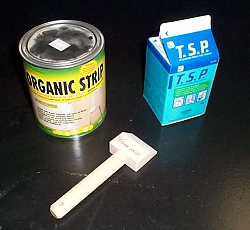
I looked for the 3m safe
stripper, but found this "safer" stuff. A little TSP to clean it
up, and a nice scraping block. Well hell, I'm all
set...right? |
|
|
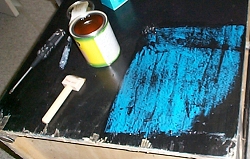 |
"Hey, this stuff works just
like magic! I should be done in no time..., hey what the??????"
The black paint came off
within 2 minutes of applying the stripper. However, the
evil cabinet gnomes had at some point added a nice BLUE
layer! Whoooo imagine that eyesore in your local arcade
instead of defender! |
| |
|
|
Well, lookie billy.
Thar be some more colour under that thar blue. I suppose I
should be thankful that the cabinet wasn't painted over in
yellow! Now, what kind of condition is that artwork in?
(This is more exciting than Geraldo's vault!) |
 |
| |
|
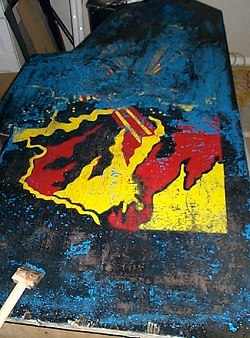 |
Well I can say I'm pretty
pleased by this point. It's a complete pain in the ass
getting that blue layer off without taking the yellow with it.
The red is pretty tough, and sticking fairly well, but it looks
like the whole thing will need retouching. Hey, I'm not
complaining here, retouching/repainting is 100% preferable to
simply spraying a new layer on with stencils. Well, and the fact
that it saves me like $300CAN for the stencils!! (Sorry
arcaderenovations.com) |
| |
|
|
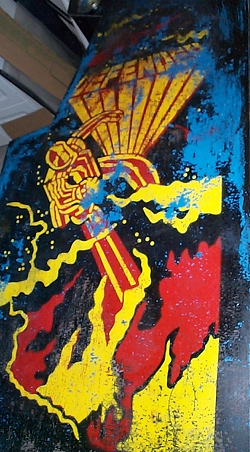
By this point it looks like
I'm going to be able to save this Defender. Honestly, I'm
feeling like a million bucks here, since I'm bringing back
something that would have been lost forever. Once I get
the paint codes, or figure out a way to have this paint matched
100%, I'll begin the work of restoring it to it's former glory.
Curse the guy with the blue paint though...curse curse curse
him! |
 |
| |
|
|
INTERMISSION! |
CLICK HERE! |
| |
|
| |
|
|
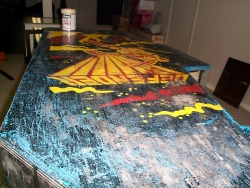
The paint was like a nun's
knickers at the top (hard to get off). Oh well, at least it didn't do this on
the artwork part. |
|
|
New cpo is in the works that will allow me to use a standard
4-way joystick (the two way ones are hard to find). Also
an invisio button is added for Stargate. |
 |
|
|
|
|
|
|
|
| |
CONTROL PANEL REVIVAL |
|
|
|
 |
The control panel, while intact, has a lot of
crap on the top. Old adhesive, scrapes and gouges. Click
to see for yourself. |
|
|
|
 |
So into the planer it goes! Now here's
one of my toys I don't get to use enough. It's amazing
just how nice a job this thing does. I set it to just
"kiss" the wood, just enough to smooth it. |
|
|
|
 |
Here it is coming out the other side.
One more pass should smooth it completely. Awesome! |
|
 |
Wow! Ready for the new overlay! |
| |
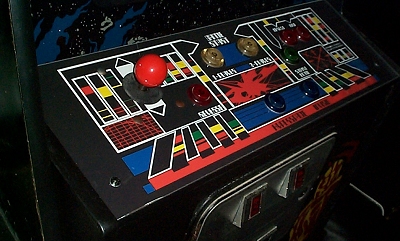
Okay, well there it is. I used
translucent buttons instead of the plain red and white ones, but
otherwise I think it turned out just nifty.
UPDATE: I have the computer system for
this. It's a P3 system with an 8 gig HD. I'll set
this up with all versions of defender and stargate. |
 |
| |
I replaced the marquee
light, and although it looks great, I might have to diffuse
it a bit, since it's too bright! Still, one more step
closer to being done, just the miniI-pac and the monitor to go
in, and it will be ready for the new gameroom!
|
 |
| |
Thar she be! I
still suck at it, so it turns out, so hopefully I can now
work on my skills! |

 |
|