| |
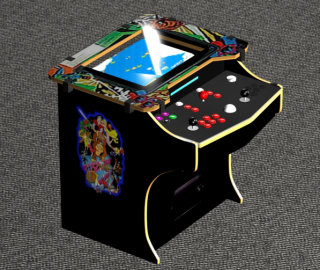
And so we come to cottage
arcade X2. The proud owner of the Cabin cocktail cab has
requested a second one for his basement! Too cool!
So now I just have to remember how I made the first one and see
if I can do it again!
|
|
| |
|
|
|
| |
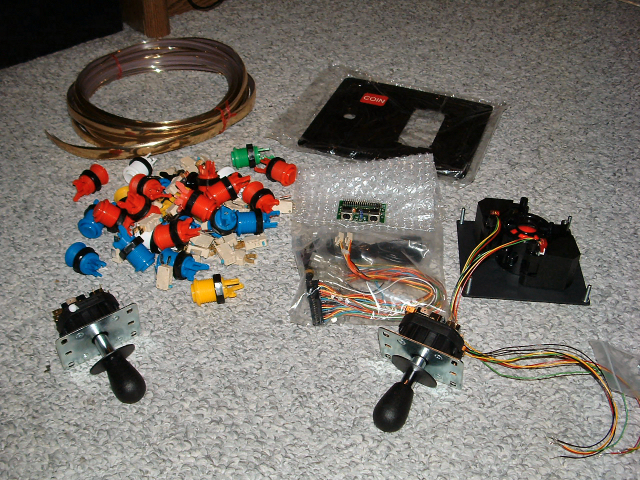
Ordered parts
from Ultimarc today. Am going to try out their coin door
and mounting plate this time, as opposed to using a second hand
one, and making a plate from scratch (gee I'm getting lazy!).
Also ordered the gold t-molding for the trim from t-molding.com
Update: 3 business days to
get both shipments to Canada! Whooo speed! |
 |
|
| |
|
|
|
| |
I also started getting
together the parts for the computer system. I think the
original was an AMD Athlon 2500+ with built-in video and 256meg
of ram. This time I am putting in an AMD 3200+, 120 gig
drive, a
dedicated nVidia video card and half a gig of ram.
|
|
|
| |
|
|
|
| |
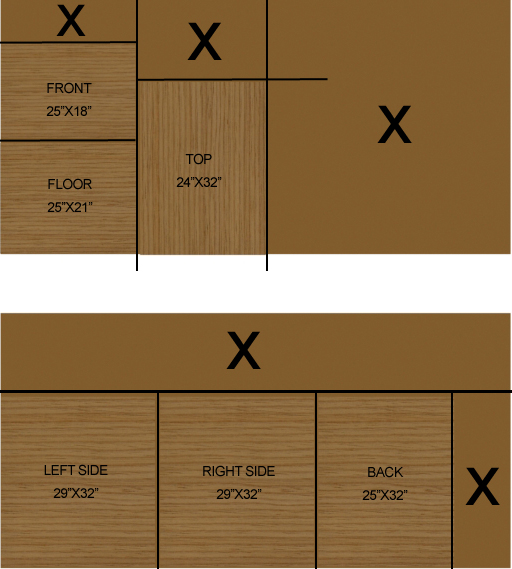
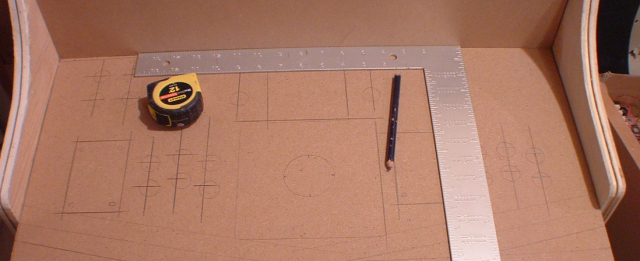
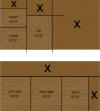
Picked up the wood today.
I'm making this out of birch furniture-grade plywood, which is
more expensive than the maple I used before, but I'm thinking
this might give me a more interesting texture to the wood
panels, at least those that aren't covered by plexiglass!
Here is the way I cut up the 4X8' sheets. I'm doing this
from a model, so hopefully everything fits when I put it
together. The control panel will be constructed from the
scrap pieces (marked with an X).
|
 |
|
| |
|
|
|
| |
It should be noted that if
you were doing this, and wanted the cabinet to be "woodgrain"
you would probably want the cuts a different way, since this way
the grain runs horizontal, not vertical. However, I am
going for a texture here, so it's the way I wanted it.
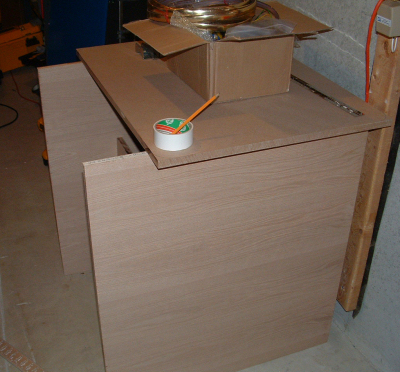
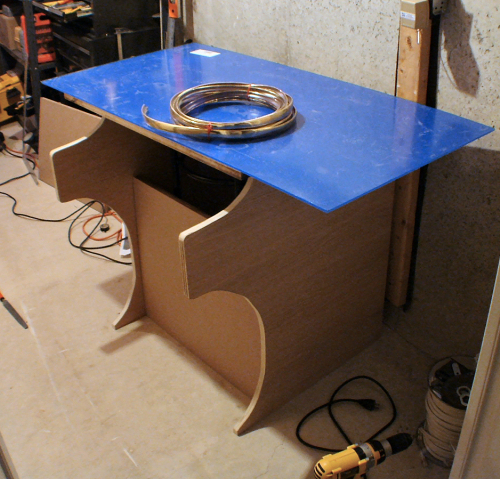
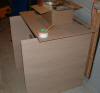
Here are the pieces set together, now I just need to start
shaping it so it will look like a cabinet! |
 |
|
| |
|
|
|
| |
Here are the first rough
shaping cuts. Seems to look right, and it matches the
measurements, so I will clamp the two sides together and sand
out the small bumps in the cuts and make them both identical.
I will then move on to shaping the top. Good progress for
one day! |
 |
|
| |
|
|
|
| |
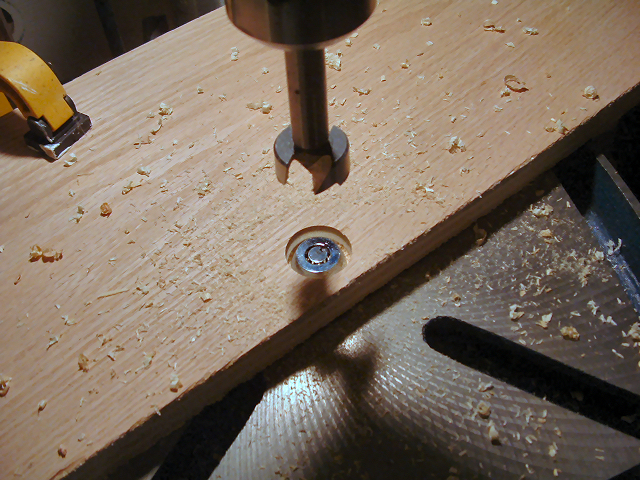
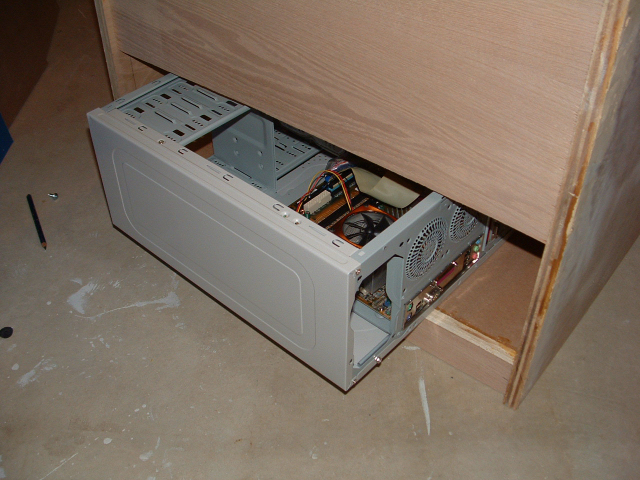
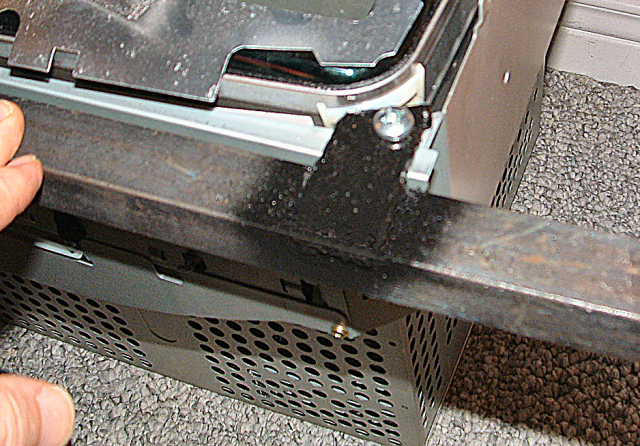
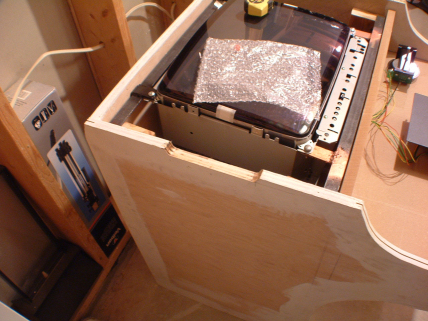
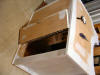
Here I countersink the barrel
lock for the back panel, and you can see how the computer can
slide in and out. I've removed the panels and front face
from the comp case so that it is just a metal frame. |
  |
|
| |
|
|
|
| |
Here you can see the back
access door attached. I've started sealing the edges of
the wood with a high-quality primer. It keeps the veneer
from splintering when I'm sanding, and will protect the metal
brackets from rust. Biscuits, brackets, screws and glue
make this one solid piece of furniture! Now on to the top
so I can get to the router-ing stage (the messiest part of the
job). |
 |
|
| |
|
|
|
| |
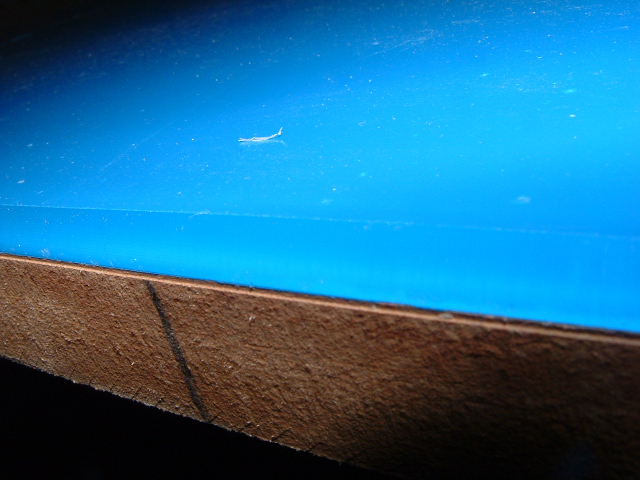
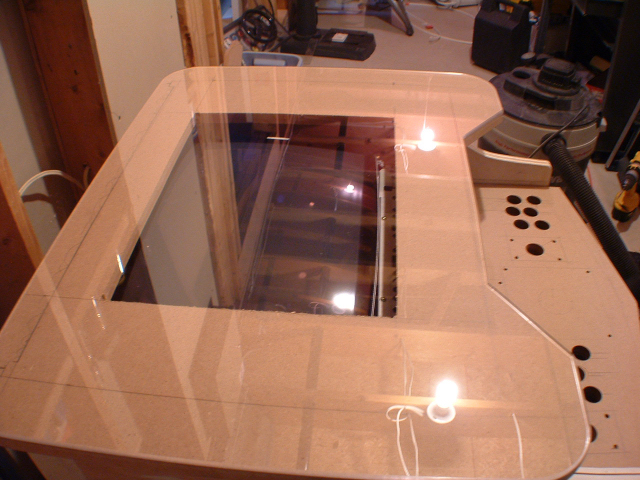
Here is the top and the plexi
cut to size. It's hard to tell, but I used a roundover
bit on the router when I did the top plexi, and it game me a
super-smooth rounded edge for the top. I'll polish it with
some 2000 grit sandpaper when the blue protective coating comes
off to give it that mirror finish. m |
  |
|
| |
|
|
|
| |
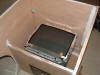
Here is the top and the coin
door installed. I don't have much room inside the unit for
everything, so the coin door mechs will be for show only. |
 |
|
| |
|
|
| |
I'd 'dry fitting' the monitor
here. The 20' monitor has enough room, but it will be
tricky welding a frame on this one since it has a cluster of
controls. |
 |
|
| |
|
|
|
| |
I did the routing for the
t-molding (I have a router that is set up do do nothing BUT
t-molding), before I realized I still had to smooth out the
curve on the 'legs'. In fact I didn't think of it until I
looked at this picture. I'll draw a new curve, route and
sand it, then re-prime. |
 |
|
| |
|
|
|
| |
The two new suspension
brackets are done, now I just need to build the support in the
cabinet to hang this from. The bulk steel has been cut,
drilled and doubled up before welding. This rig is going
to be bullet proof when installed. Tomorrow I think I'll
get started on the control panel itself, which is the one big
job left to do (along with a million little jobs!) |
 |
|
| |
|
|
|
| |
Here are the heat vents.
You can also see the monitor suspended in place. Also
started construction of the control panel. |
 |
|
| |
|
|
|
| |
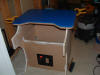
Setting up the control panel,
let's make sure it's perfectly level! |
 |
|
| |
|
|
|
| |
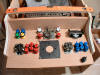
Here is the layout for the
controls. This is pretty much my standard setup now.
Two 8 way sticks with 6 buttons, one Wico 4-way with left and
right hand fire button, trackball, spinner off to the right
(away from the trackball). Left and right mouse buttons,
coin button, pause button, P1/P2 buttons and two sets of pinmame
buttons. Oh yeah, and a plunger button on the front.
One thing I don't do is offset the trackball or 4-way joystick.
That keeps people from wrecking your trackball playing Golden
Tee.
Notice the almost-impossible-to-get brand spankin new Oscar Vortex spinner! Last of my secret stash! |
 |
|
| |
|
|
|
| |
I make sure the controls are
marked all square to each other. |
 |
|
| |
|
|
|
| |
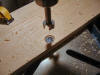
The drill press makes nice
clean work of the panel blank. |
 |
|
| |
|
|
|
| |
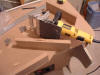
I don't know if I've gone on
about this tool enough, but trust me it's a lifesaver. The
DeWalt biscuit joiner hollows out groves in your wood, and then
you insert compressed hardwood wafers. When used with
carpenters glue, they expand in the slots, making a rock solid
connection. If you interlock your biscuits correctly, they
will get strength from each other. I've used it on almost
every control panel I have made, and I've never had one fail
yet. |
 |
|
| |
|
|
|
| |
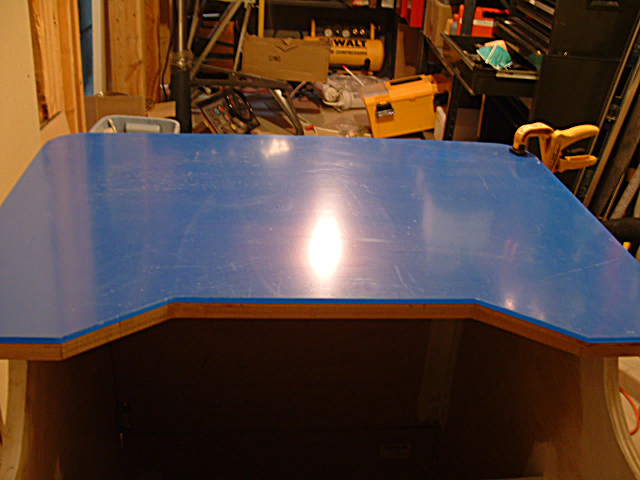
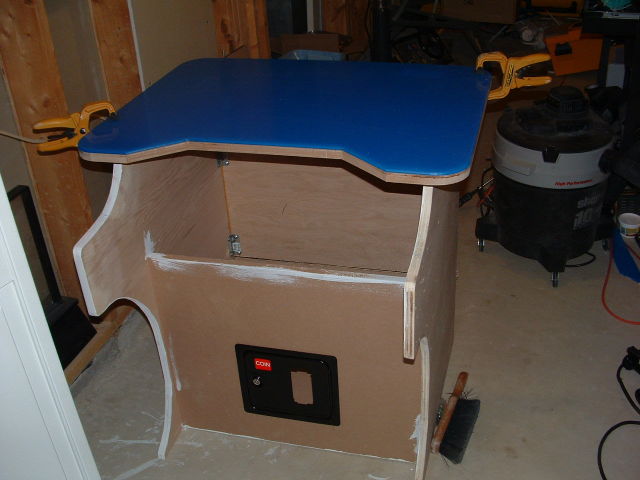
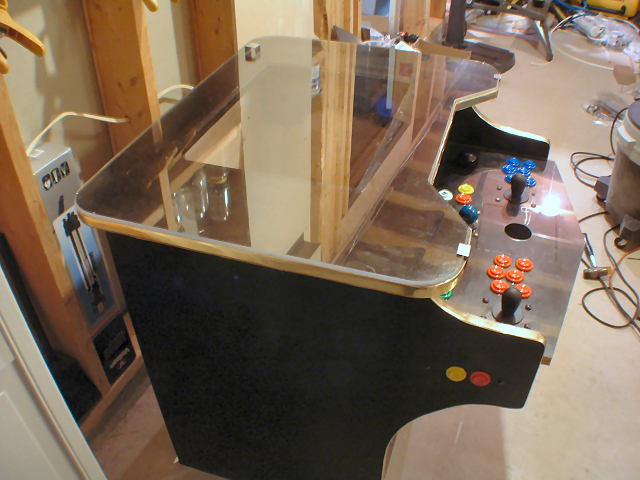
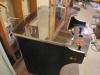
Oooh! I couldn't be
more pleased with the way this top turned out! The rounded
edges give it a very professional feel! The control panel
is bolted to the frame, and I picked up the sheet of plexi for
that, as well as another piano hinge for the top. |
 |
|
| |
|
|
|
| |
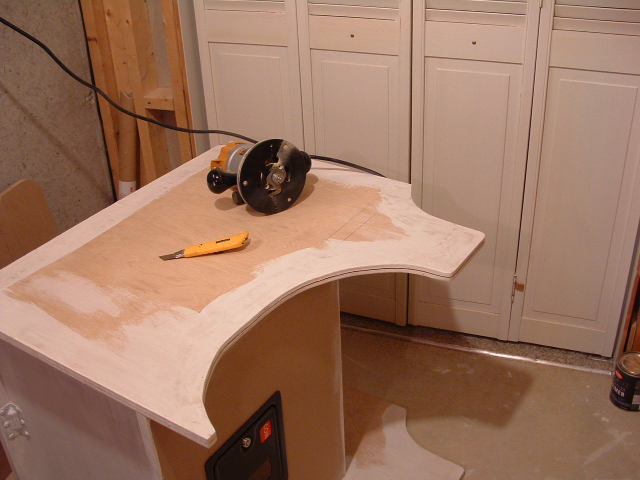
Well, may not look like much
of a change, but the top is attached, the bezel indentation is
routed, the plexi is cut for the control panel, the trackball
plate has been recessed flush, and the pinball buttons are
drilled. Tomorrow I will use the router on the underside
of the panel to bring up the level of the joysticks.
There's still a long way to go! |
 |
|
| |
|
|
|
| |
Paint is done, t-molding is
on, controls are mostly installed (if not wired), and I'm
starting on the custom clips for the plexi top. Tomorrow
I'll work on securing the control panel, making the top
lockdowns, and wiring. Good progress this weekend! |
 |
|
| |
|
|
|
| |
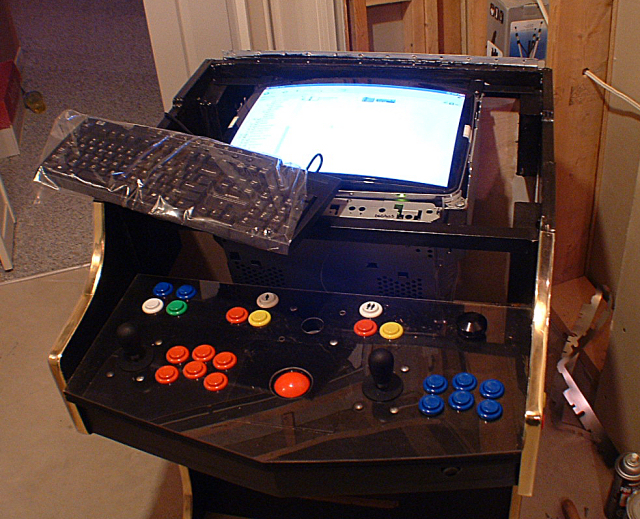
I got the computer up and
running. Control panel runs nicely, everything seems to be
going along smoothly (knock on wood!) |
 |
|
| |
|
|
|
| |
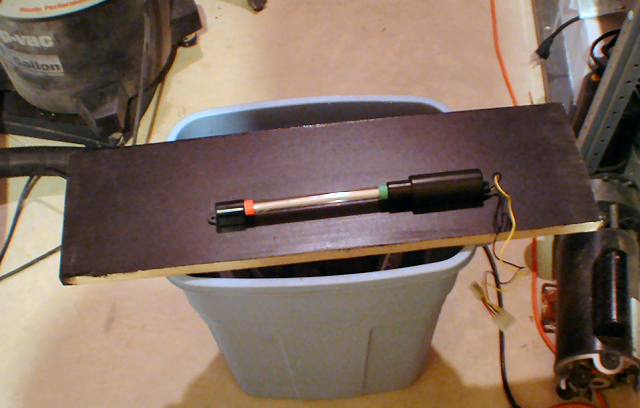
The 'disco' light will sit in
behind the control panel. Here I mark it out so that I can
route a nice channel for it, and set it behind some plexiglass. |
 |
|
| |
|
|
|
| |
|
|
|
| |
|
|
|