| |
|
|
|
| |
The original control panel
was inside this converted cab. I'll use it as a template to
see if I can get all the controls we want on there without
having to make a wraparound panel. I just don't think the
wraparound panel would at all right on this cab. Plus of
course it will be restorable. Remember I don't like to
make a classic un-restorable, even a cabinet that was as
mass-produced as this one. To me, the Space invaders is
not only a good looking cab, it's also a true classic for me, in
that it is the first cab I ever remember seeing. The
memory of begging that first quarter off my mom at the local
K-mart to play it is burned into my brain. Oh yeah, I have
reverence for this one. The FIRST game I play on this will
be a good game of Space Invaders. |
 |
|
| |
Looks like it will all work fine. I'll
run a test panel through autocad, but my eyeball says that the
layout will work. Time for yet another order to ultimarc! |
 |
|
| |
I got the cab inside and
stripped down. The old T-molding came off, and I used a
combination of TSP and diluted brush cleaner to clean up the
finish. There was a lot of years of smoke and grime on
there. There will need to be a bit of scratch and hole
repair, but not as much as on most.
|
 |
|
| |
There were a few nails
hanging out on the inside of the cabinet, I didn't want to
hammer them out through the side, since it would have had to pop
out through the painted artwork, so I just cut them down with
the ever handy dremel. |
 |
|
| |
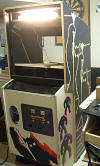
Good progress here. I
got the old speaker grill off for refinishing and the new
monitor shelf mounted. Up top I created a custom marquee
enclosure. I'll need to create a custom bezel glass,
graphic and monitor cover, but progress so far is great! |
 |
|
| |
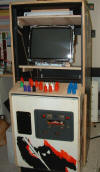
20" trinitron tube installed
and start of the new control panel. Refinished speaker
grill reinstalled. I'll start on the cardboard bezel
surround next. |
 |
|
| |
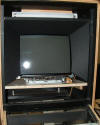
I created a cardboard
atari-esq bezel for around the monitor. Here you can see 3
sides complete. I'll cut the piece for the bottom and it's
done. |
 |
|
| |
I should almost just buy a
piece of plexi and smash it to bits before I start each project.
In fact, if I get through an entire cab without breaking a
piece, I'll sacrifice some just to appease the sadistic plastic
gods. |
 |
|
| |
There is the
complete panel. Two happ supers, an ultimarc 2 1/4"
trackball, Oscar Vortex spinner and 6-button per player setup.
I really wanted the graphics on here to fit with the theme of
the cabinet. So far so good. |
 |
|
| |
Here is the ultimarc
minipac wired up to the controls. I'll clean it up a bit
with cable ties once I know I wired it correctly and everything
runs.
|
 |
|
| |
Aardware
did up a power pc for this machine. We want it to be able
to play pc games like tiger woods golf and nhl 2004 on this.
They did a great job as always. Check them out if you need
a custom pc solution. I think They ship worldwide. |
 |
|
| |
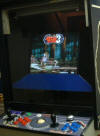
I spent a bit of time trying
out the machine. The trackball wires on the minipac had to
be reversed, since the trackball went up instead of down, but
other than that the panel worked first try. |
 |
|
| |
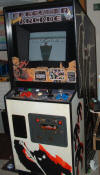
Here is the
completed cab. As you can see I did the bezel artwork to
resemble the original space invaders bezel somewhat. I
wired 12V lights to the coin doors and spliced a power bar to an illuminated rocker switch on the top of
the cabinet along with a system startup button. Mamewah is
up and running, and the jukebox tunes sound awesome through the
Yamaha sound system. All in all a nice classic with intact
cabinet artwork, which could easily be converted back to its original
form if someone so wanted. I feel good about this one.
As much of the original feel as I could get into it. The
control panel is functional and not over-the-top. |
 |
|
| |
|
|
|
| |
|
|
|