
The following will detail the
conversion/restoration of this cabinet.
BACK
| |
 |

PERCENT COMPLETE |
|
| |
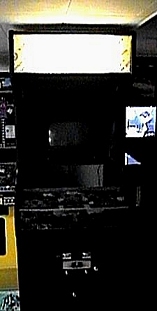
Here is
a nice blurry shot of the start of the Massive cab. I picked up a
big old Jailbreak conversion. The cabinet had been
broken into, the bottom was filled with concrete, and the thing
was filthy. It took four
of us to move it out of the basement it had been stored in. It
didnít take me long to chip out the concrete, remove the marquee
and electronics, and scour the cabinet inside and out.
|
|
|
| |
 |
This is what the
inside looked like when I got it. A complete hack job. Wires
sliced and some left dangling. Complete fire hazard Iím sure. I
was going to leave the the power supply in there, to run the
monitor and marquee light, but once I decided on a computer
monitor, I pulled everything out. I had to remove the bottom to
get the layer of concrete out, but after some sanding and a
little paint, the bottom was as good as new. The only thing that
remained was the PCB shelf. It was a perfect spot for the computer.
|
|
| |
 |
 |
|
| |
Here is the sides, with all the gouges and scrapes repaired.
Next a layer of primer, and a black layer from the spraygun.
|
After a bit of work, I painted in a custom logo to the sides.
A 20" monitor is installed, and the control panel is
constructed. |
|
| |
Revision
one of the panel was a 2 player layout with trackball and
spinner. The new owner however fell in love with the layout of
the 4 player panel on the Dyno, Power and Centi cabs, so it's
going to get one of those. Time to get in the workshop
again! |
 |
|
| |
 |
 |
|
| |
|
|
|
| |
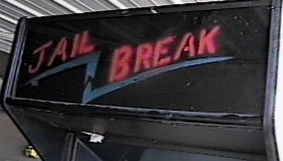
Whoo! Some 'converters' spend a lot of time on the marquees.
Well, and some don't. I have a strange feeling that the
person that made up this marquee was really proud of himself... |
The after
shot is much better. Clean and simple. (Available
for download in the marquee section) |
|
| |
|
|
|
| |

Here the new panel starts to form. Now to notch it and fit
it to the cabinet, and finish the back end of it, and start on
the top. Time for a parts order to get some new joysticks
and a spinner...oh and an interface, and some artwork...well you
get the idea. |
|
| |

And for the artwork, the new owner likes this underlay, so its
going to the printers. |
|
| |
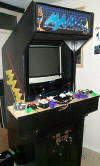
There we
go, new parts set where they will go, and 20" monitor installed
(bezel not shown). I've got the trackball mounting plate
done, and the plexi cut, so no I just have to start drilling the
holes and start getting these pieces in there.
|
|
| |

|
|
| |
Here you
can see the drilled and routed piece of pine. I really have liked the
way the pine boards have turned out. The wood is soft
enough to route and drill, but strong enough to withstand some
solid punishment. I of course reinforce that trackball
with steel, and the plexi on top helps add to the sturdiness,
but overall a very good wood to work with if you pick your
pieces carefully. This piece will be primed and painted
before the controls and underlay go on. |
|
| |
|
|
|
| |
 |
I have been asked how I do
the trackball mount, and here is the crazy secret. I get
some bulk stock steel, cut it, then drill a hole with a bimetal
hole saw. I then drill the screw holes, and the trackball
mounting bolt holes. I use a metal countersink bit to cone
out the screw holes. The wood panel is routed to match the
size and shape of the plate, and then it is set in place.
I like to fill all the cracks and surfaces with glue, just to
give some added strength, then screw the plate down.
Anyplace that isn't perfectly flush gets a bit of extra strength
wood filler, some sanding and then primer and paint. The
trackball mounting bolts go through the plexi on top, which
sandwiches the whole thing together, making for a good solid
trackball mount! |
|
| |
The control panel graphic is
here, and the trackball plate is in place. Now to start
putting all the pieces together, and of course, another order to
Ultimarc for a juicy I-pac4!! |
 |
|
| |
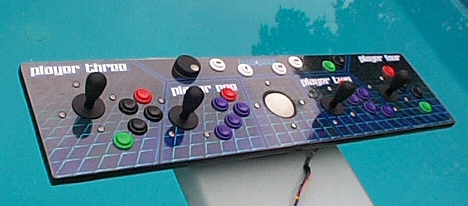
 Okay,
got the controls installed, if not wired. And yeah,
they're sitting on my diving board. Why? What better
place to while away the hours making a control panel but
lounging by the pool? I just have to make sure that after
beer #6 or so I don't drop the thing in the deep end... Okay,
got the controls installed, if not wired. And yeah,
they're sitting on my diving board. Why? What better
place to while away the hours making a control panel but
lounging by the pool? I just have to make sure that after
beer #6 or so I don't drop the thing in the deep end... |
|
| |
|
|
| |
|
|
| |
 Well
there she is plugged into the cabinet... Well
there she is plugged into the cabinet... |
|
| |
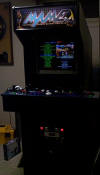 And,
here is the completed cab, waiting for delivery... And,
here is the completed cab, waiting for delivery... |
|
|