Again it is prudent to stress that if youíre not 100% sure that you have discharged the monitor correctly, then STAY THE HELL AWAY FROM IT. Itís not worth your life just to play a game of Bubble Bobble.
Secondly, I cannot be held responsible for any damage or injury that may result from attempting the procedures on this page. You do so at your own risk!
Now, with that out of the way, we may proceed. What you will need is:
The original video wiring harness from your arcade monitor.
An old vga plug, or a cut vga extension cable (male end).
A low-wattage soldering iron and flux.
A multimeter.
Patience.
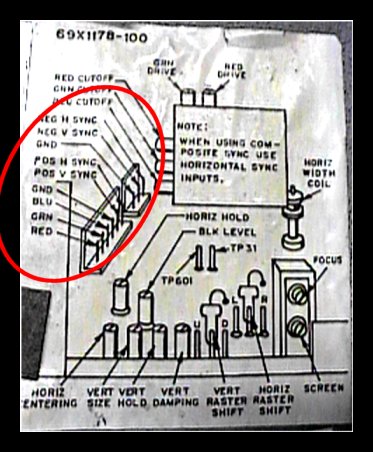
Okay, it works like this: We need to feed the output from the computer (running ArcadeOS for example) to the arcade monitor. NOTE: If you do not have the computer set up to output to an arcade monitor, you will likely damage the monitor, the video card, and perhaps your computer. You will need to identify both sides of your adapter. On your monitor side, you should hopefully be able to find a pinout on the enclosure, such as this one:

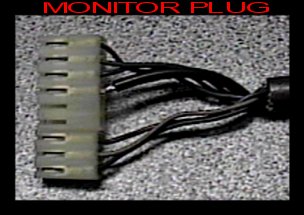
Okay, the part we are concerned with is circled in red. Those are the pinouts for this monitor. We diconnect this plug, which should look something like this:

On this monitor, the positive and Negative V-Sync wires are not connected. Donít worry about this, if the monitor was running before without them connected, then it should also run afterwards.
Cut this cable about a foot back from this plug, and strip the wires. Donít just assume from the color of the wire either, check each wireís continuity with your multimeter. Checking and labeling EACH wire is very important. If you cross the wires, or donít separate them properly, you could very easily destroy your monitor, video card and motherboard. (I know this for a fact) Once you have them stripped and identified, then we can proceed.

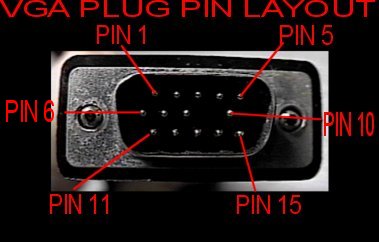
This is the view of your standard vga plug. Down in beside each pin should be a tiny number, and it should correspond to the pinouts above. Cut the cable, allowing yourself enough length to reach the computer once it is in the cabinet. Then strip and label each of these wires using the same procedure as above. NOTE: Sometimes the video wires are doubled up, and you will have a tiny inner wire, and a larger ground wire inside the same casing, such as the RED BLUE and GRAY wires (such was the case on this cable).
Once you have all the wires stripped and carefully separated and labeled, we can proceed to the chart.
You only need to worry about 10 of the pins on your vga cable. Configuration may differ from monitor to monitor, so things have to be a bit general here. Just be careful and check and double-check EVERYTHING. Attach the red green and blue wires to the red green and blue leads from the monitor plug. The grounds can be common, on the single ground pin. Then solder the Horizontal and Vertical synch wires to the corresponding wires on the plug. NOTE: if your arcade monitor has only one synch pin, you can overcome this by twisting the synch wires together. You can connect the synch ground to the synch ground pin, or probably even the common ground.
PIN WIRE
1 - Red
2 - Green
3 - Blue
5 - Ground
6 - Red Ground
7 - Green Ground
8 - Blue Ground
10 - Sync Ground
13 - Horizontal Sync
14 - Verical Sync
Now is a good time to get that multi meter out again, and make sure that all the connections are correct, and that wires are not touching each other. This is very important.
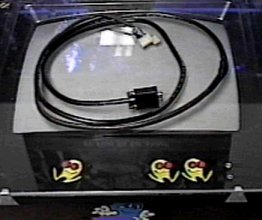
Once your are SURE of your connections, check again. Once this is done, you can tape up your wires, secure them with heat-shrink tubing, or encase them in silicone. You do not want these wires touching while you are moving about the pieces, or when you are smooshing them into an arcade enclosure. When complete, it should resemble the following:

Now visit these links, and doublecheck with the information there, it could very well be that the other sites may have something that applies better to your particular monitor, or that something here was mistyped.
http://www.mrsalty.net/arcade/monitor/monitor.shtml
http://www.mameworld.net/pc2jamma/pc_arc3.html
Now, run your frontend, set it to ďARCADE MONITORĒ, and then cross your fingers and turn on your screen. If everything goes well, there should be no smoke and fire.
Also, if you are using the arcade monitor, be SURE to plug it into an isolation transformer and not straight into an outlet!
Thatís all there is to it, besides some fiddling with the refresh settings. Good luck!
(c)2002 Massmame Inc. All rights Reserved. No duplication without permission.