|
.: Add a volume dial to your MAME
cabinet.
2/8/03 - Thanks to Tehrasha from the BYOAC message board! Teh informed me that I would get a much better range from the pot if I had it connected in parallel with the amp, as I originally had it connected in series. I changed my setup, and it works much better now. This write-up has been updated to reflect these changes. On my current cabinet project, I'm using a car amplifier to power the speakers. I have the PC soundcard connected to the amp, which in turn will be connected directly to the speakers . Since I will not be using a preamp equalizer or any other preamp devices, this means that I would have to rely on software based volume adjustment. I would like greater control over the cabinet volume while playing games, so I need to add a volume control. Fortunately, this can be accomplished fairly simply and on the cheap! :)
|
|
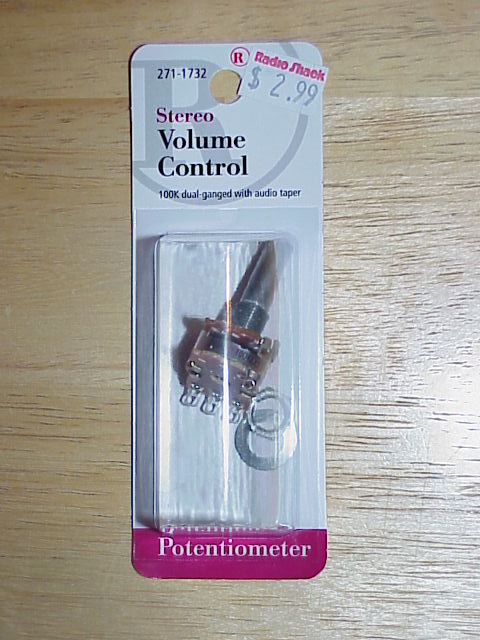
First, find a suitable potentiometer (pot). Be sure it is an audio
taper because linear taper pots are not well suited for use in audio
systems. Since my system is stereo and I only want a single
adjustment control, I need a dual-ganged pot.
Radio Shack makes such a device and it's pretty cheap, too.
|
|
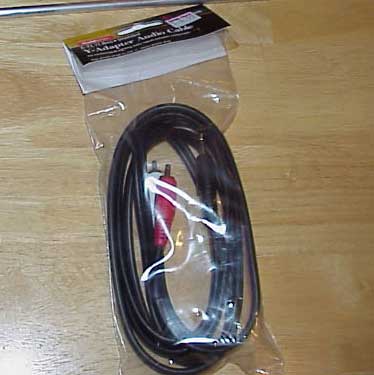
This pot is only rated for .05 watts, so it needs to be wired to the input
side of the amplifier and NOT to the speaker wires. The pot is going
between the soundcard and amp, so I purchased the appropriate cable.
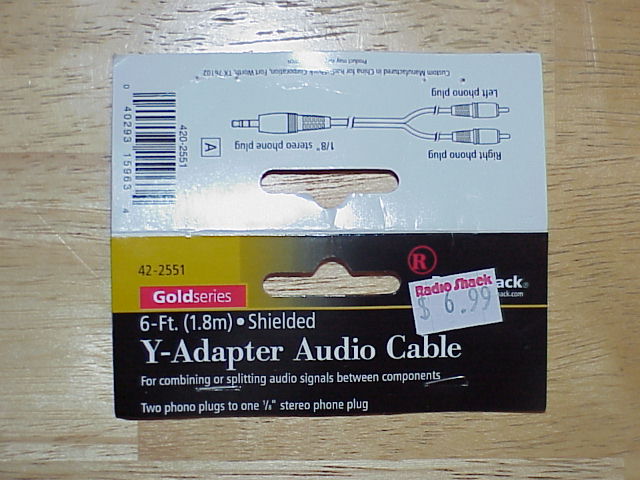
In case you don't have a multimeter, be sure to mark which cable
corresponds to which color audio connector before you cut the cable.
That will help keep your left/right channels straight.
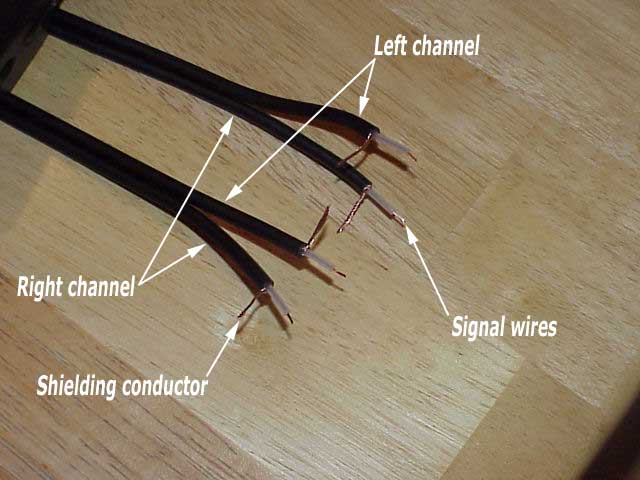
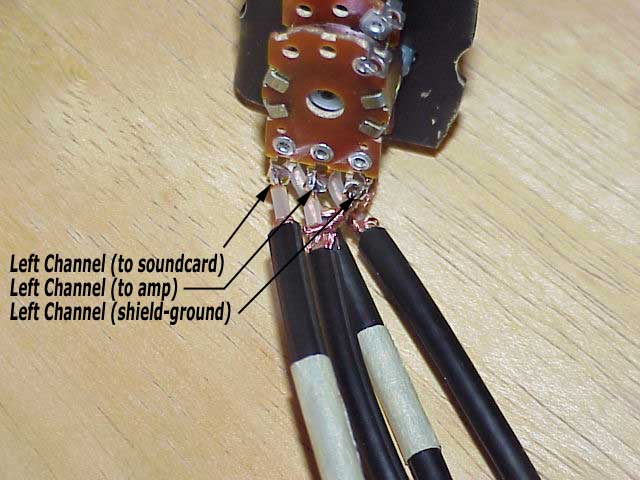
Cut the cable in half (or wherever you want the volume control placed) and strip back the outer sheath. The cable will have a shielding conductor (ground), most likely made from fine copper wire or possibly a foil. The cable I purchased had copper wire shielding ground. Twist these together and bend off to the side. Next strip off about 1/4" of the insulation from the signal conductors.
Solder the soundcard signal wire to one of the outside tabs on the pot. Twist the grounds together from both cables (soundcard side and amp side) and solder to the other side of the pot. Finally, connect the amp signal wire to the center lug of the pot. The soundcard and ground connections can be swapped, but if connected as shown in the below photo then turning the dial clockwise increases volume which is pretty standard. This photo only shows the left channel connections, but the right channel connections are identical on the other three tabs.
|
|
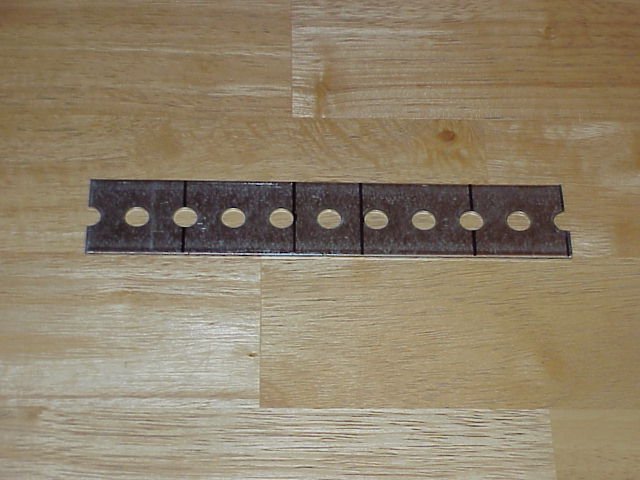
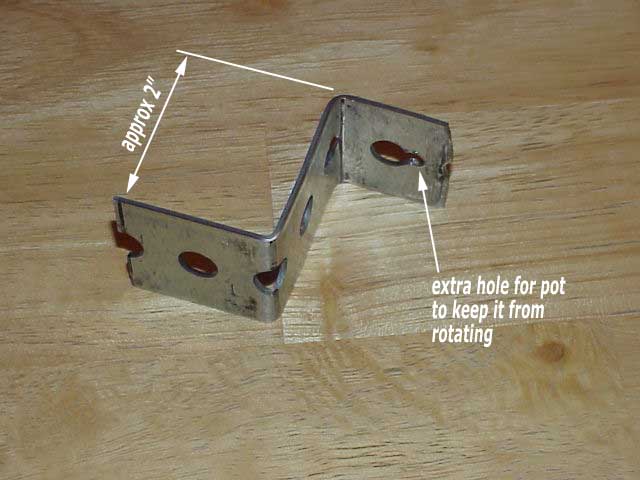
The next step is to make a bracket to attach
the volume control to the cabinet. I scrounged up a piece of slotted
flat stock from the garage. You can buy this, or standard flat
stock, at any decent hardware store or home improvement center. I
bent the flat stock into a bracket with my vise. Note that an extra
hole or slot will need to be made for the pot because it has a peg in the
base to keep it from rotating when you turn the dial (below pic). The size of the bracket was
determined by the shaft extension I plan to add to the pot since the pot
shaft is pretty short. I
figured it would be easier to extend the shaft than it would be to route
the backside of the panel since this control is a retrofit.
|
|
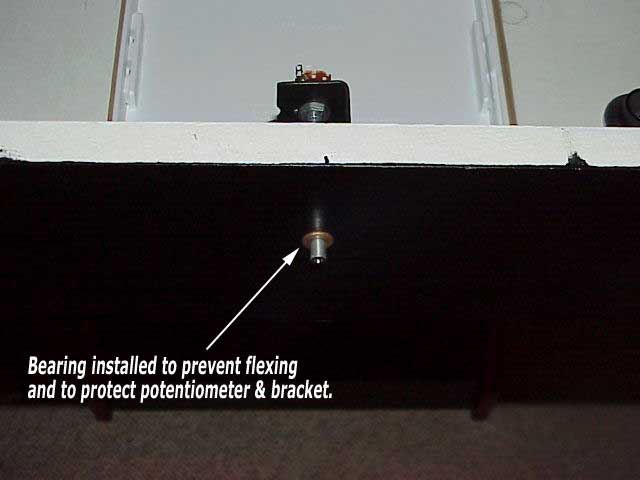
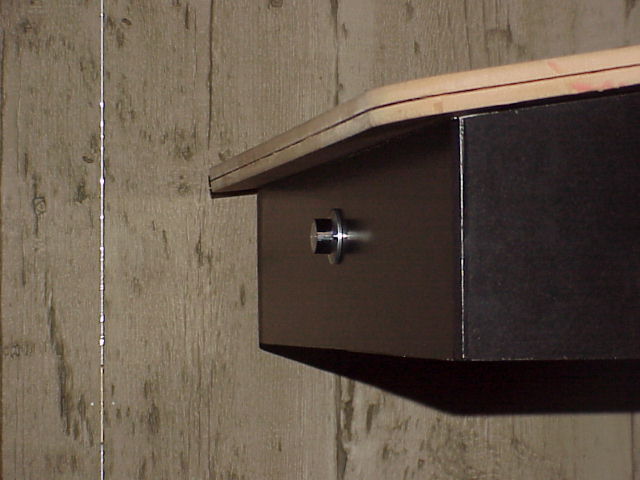
I need the volume control to be easily
accessible, yet out of the way so it doesn't get bumped or hit while
playing so I located it in the front center of the control panel. I
also want to give the volume knob a good, well-supported feel so it
doesn't feel like it is moving around. To do this, I drilled the hole in the control
panel large enough to accept a flanged bearing. The bearing will
also help protect the pot because it keeps the shaft straight and doesn't
allow any flexing of the bracket. In these photos you can see that
the shaft extension was accomplished with a couple of shaft collars and
some 1/4" aluminum round stock.
|
|
For the finishing touch I attached a spare
knob laying around (image that!). I gave the knob a few turns back &
forth... Ahhh, the bearing was a nice touch, it feels nice and solid just
like a good home receiver volume control. Now I just need to finish
the rest of the cabinet... :)
|
|
Final Comments The total cost for this addition was about $10 for me as the only items I had to purchase were the pot and cable. Even if you had to buy everything, it would likely be less than $20. This pot is a 100K Ohm audio taper pot, as previously mentioned. According to it's specs, this allows for about a 100dB range of volume adjustment. To set the system volume, I adjusted the volume knob to zero resistance so I can set up the cabinet for the maximum volume. The purpose of the volume knob on my cabinet is to turn the system DOWN, I don't need people (myself included, at 3 A.M.) cranking it up! To set the cabinet up for the maximum allowable volume I set the Windows software volume control to maximum, and then adjusted the amp's gain control until I had the maximum volume I was satisfied with.
Questions? Email for information |
|
Oscar Controls |