How to Bleed & Flush Brake Fluid - Brake Bleeding
1990-2000 Lexus LS400
The braking system on your car is vital because it affects vehicle safely and performance. Unfortunately, brake fluid often gets neglected. The major sign of neglect is a "spongy" feel of the brake pedal, this indicates moisture in the system. Brake fluid can absorb up to 7% moisture, but after that you get water and that means problems will develop. Another sign of neglect is brake fluid that has a dark or murky brown color. If you have one of these symptoms then it's probably time to replace your brake fluid. A complete brake fluid flush (this tutorial) is recommended every 2 years or 24,000 miles. It doesn't matter if you drive a little or a lot, brake fluid deteriorates over time and must be changed! The good news is that this is relatively simple.
Bleeding Pattern
Different cars have different bleeding patterns. Brakes should be bled starting with the wheel that's furthest from the master cylinder
and then working in towards the cylinder. Now you would think that would be the rear passenger wheel, it's not! Taking a look at the
repair manual shows the routing of the brake lines. It's very clear that the wheel furthest from the master cylinder is the rear driver's
side. So for 90-94 LS400's the bleeding pattern is: rear left, rear right, front right, and front left. Consult your owner's manual and/or
repair manual for proper bleeding order.
Tools Needed:
- 10mm box wrench
- A "pumper" (someone to pump the brakes)
- Funnel
Parts/Supplies Needed:
- Several quarts of new brake fluid, DOT 3 type is recommended by the manual
- Clear container to hold the old fluid (old 2 liter bottles will work great, keep the cap)
- 2-3 feet of 3/8" clear vinyl tubing
- Old turkey baster, something to suck out some fluid from the reservoir
- Shop towels
Optional: Operational test of the brake booster
Operating Check
Press the brake pedal a few times and on the last press hold it down and then start the engine. If the pedal goes down slightly operation
is normal.
Air Tightness Check
Start the engine and then turn it off after 2-3 minutes. Press the brake pedal several times slowly to exhaust the brake booster. If the
brake pedal goes down farthest the first time and then gradually rises on the 2nd and 3rd press this indicates an airtight brake booster.
1) Loosen the lug nuts on all wheels then jack up the car and put it on jack stands, remove the wheels.

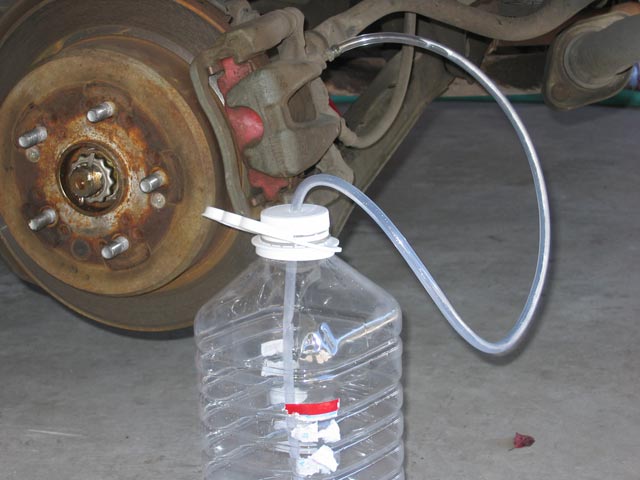
2) Remove the rubber cap on the bleeder valve and attach a clear 3/8" vinyl tube to it. Place the other end of the tube in a clear container.

3) Open the brake fluid reservoir and use something to suck out most of the fluid. Then top off the reservoir with new fluid and close the cap. Close the cap of the new brake fluid container as well. Remember, brake fluid absorbs moisture in the air. Also, try not to get brake fluid on any painted surfaces because it eats away at it. Immediately clean up any fluid that is spilled. To prevent drips it helps to place a shop towel around the reservoir.

4) Instruct your "pumper" to press the brake pedal 3 times and hold it down on the third press. With the brake pedal being held down, then use a 10mm wrench to loosen the bleeder plug about 1/4 to 1/2 of a turn. Let the fluid run out for only 1-2 seconds and then close the bleeder plug (it doesn't have to be super tight). While you have the bleeder plug open your pumper will feel the brake pedal sink to the floor, this is normal. Make sure they keep pressure on the pedal until you tell your pumper to release the brake pedal.
5) Top off the fluid in the reservoir and then close the caps on the reservoir and new fluid. Note how much the level in the reservoir decreased for the 2 seconds you had the bleeder plug open. You NEVER want the reservoir to become completely depleted because this would introduce air into the system...not good.

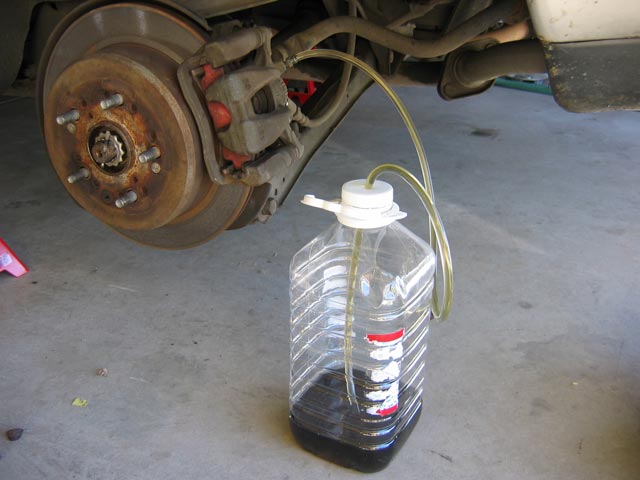
Here you can see some air bubbles that have been removed from the system.
6) Repeat step 4 and 5 until the fluid that comes out is the same color as your new fluid or until there are no air bubbles. The reservoir will go from MAX to MIN with about 5 pumps. You'll figure out what works best after the first time doing steps 4 and 5. Again, it is very important that the reservoir never becomes empty. As you may have guessed, you will need to be able to communicate well with your pumper.
7) Once you're done with step 6, remove your vinyl tube and torque the bleeder plug to 8 ft-lb (110 kg-cm, 11 Nm). Replace the bleeder plug cap, top off the reservoir, put the wheel back on, and move on to the next wheel.
8) Repeat steps 1-7 for the rear right wheel.
9) Repeat steps 1-7 for the front right wheel.
10) Repeat steps 1-7 for the front left wheel.
11) When all wheels have been flushed, start the car and check brake pedal firmness. Then go for a gentle test drive to check that your brakes work.
12) Dispose of your old brake fluid properly by bringing it into your local recycling center. DO NOT dump it down the drain or into your backyard, it is illegal!!!
Lexls.com Notes: Thanks for the pictures Thuan! Thuan's brake bleeding tutorial is located here on the Lexus Owners Club (LOC) forum.
If you found this information useful please support the site by clicking the button below and making a donation. Thank you.
