How to Remove the Instrument Cluster / Combination Meter
1990-1994 Lexus LS400
Maybe you want to fix the instrument cluster lighting or maybe you just want to test a few circuits. In both cases you need to remove the cluster. The hardest part about removing this is disconnecting the wiring harnesses because there isn't much space and they are locked in very securely. Hopefully my instructions will make the removal of the instrument cluster easy for you.
Tools Needed:
- Screwdrivers
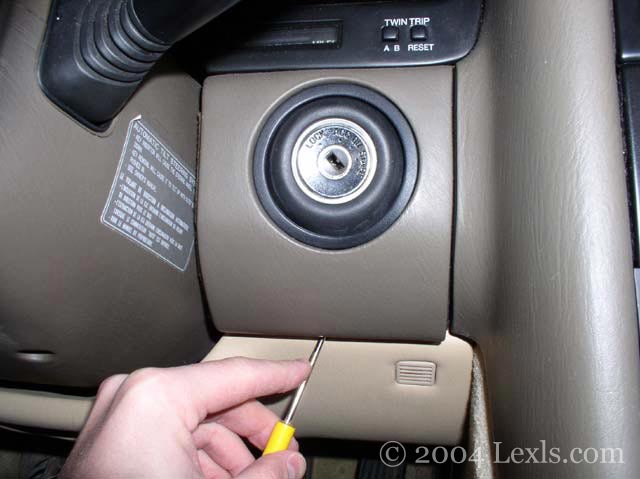
1) Pry off the ignition panel using a thin flat-head screwdriver. This will make it easier to pull the trim piece off.
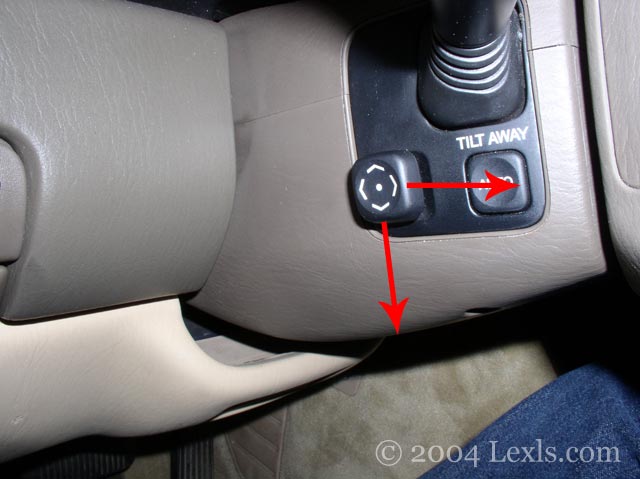
2) Put the key in the ignition and leave it in the "LOCK" position. Move the wheel to the furthest position back and the lowest position down. This gives you just enough room to work.

3) Remove the negative (-) lead on your battery and wrap it with a cloth. Wait at least 20 seconds to begin work.
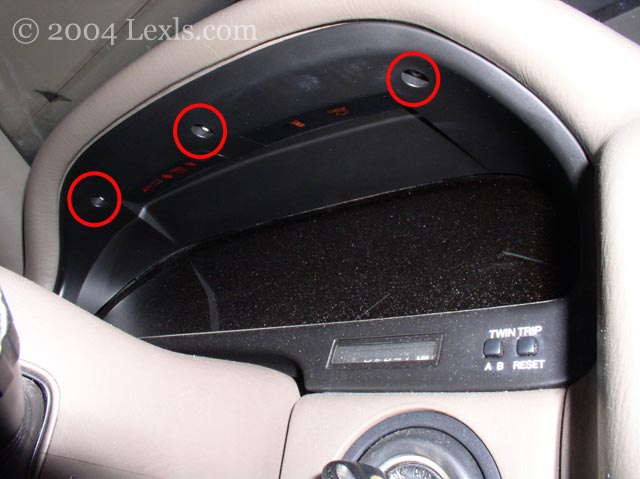
4) Unscrew these 3 screws.
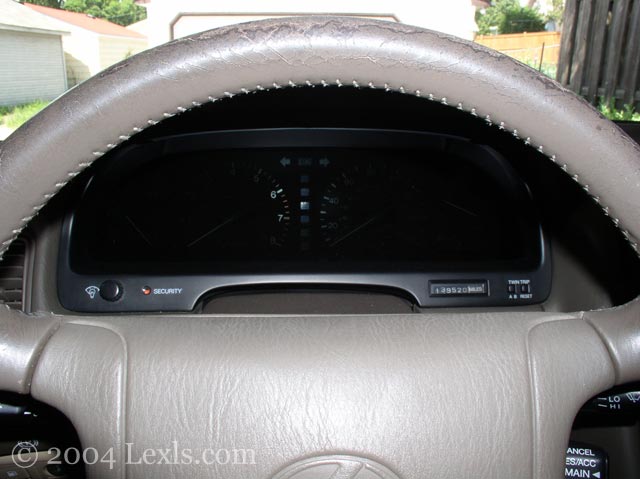
5) Starting with the lower right corner by the odometer pull straight back on the black trim piece. It is held in by a clip and should pop right out but you need to pull fairly hard. Once the right side is out you should have a little bit of room to get your fingers behind the left side and pull it out.
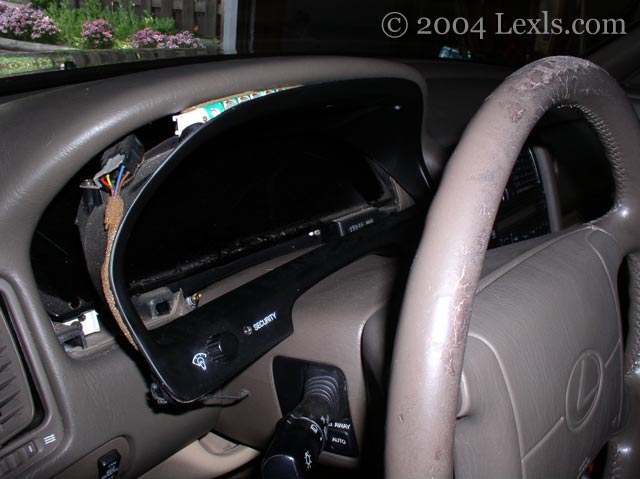
When you have the clips undone pull the left side out a little so you can see the wiring connector.
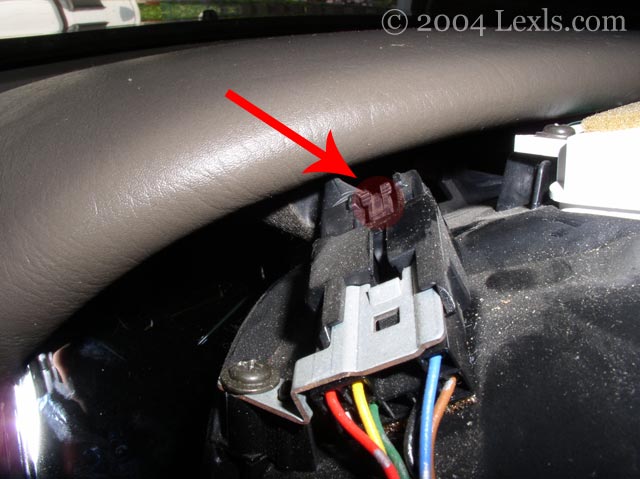
6) Use a thin flat-head screwdriver to push down on this connector tab to unlock it. While pressing down pull the connector out. Tip: If you push down on the connector tab at the right angle you can also push it out, just be careful.
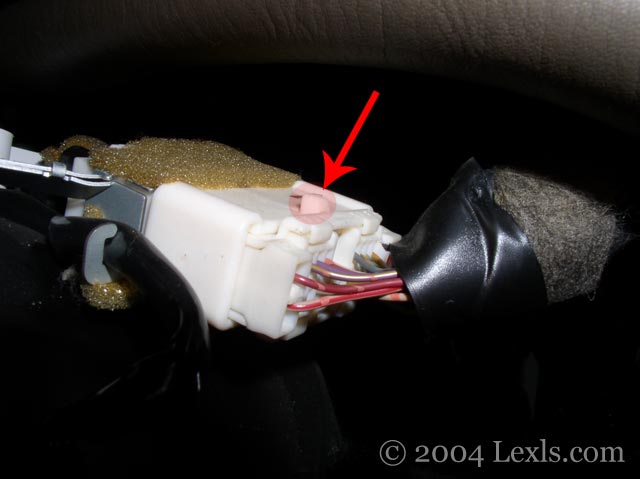
7) Here is the connector on the right side of the instrument cluster trim piece. Use a thin flat-head screwdriver to push down on this tab to unlock it. While pressing down pull the connector out. This connector is a lot harder to get out and you will have to press down really hard to unlock it. Remove the trim and set it aside.
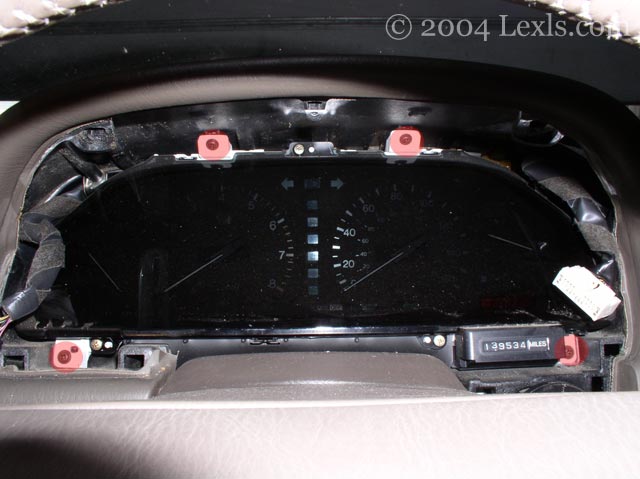
8) Unscrew the 4 screws highlighted in red.
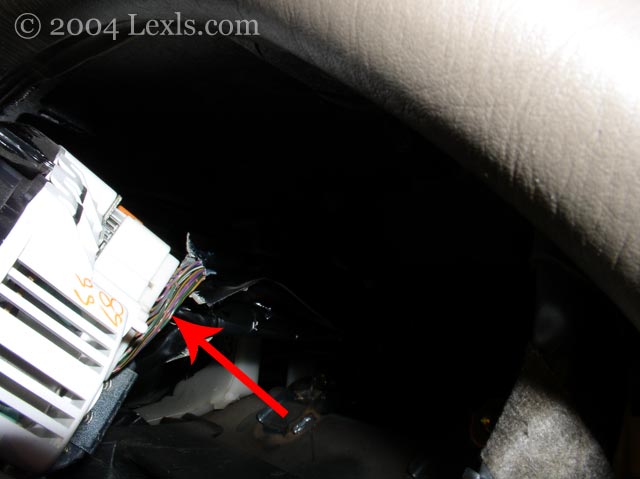
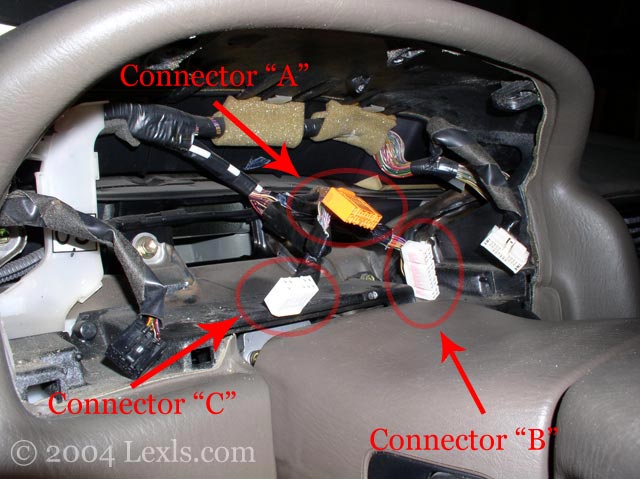
9) Carefully pull out the right side of the cluster as much as you can so connector "B" is exposed.
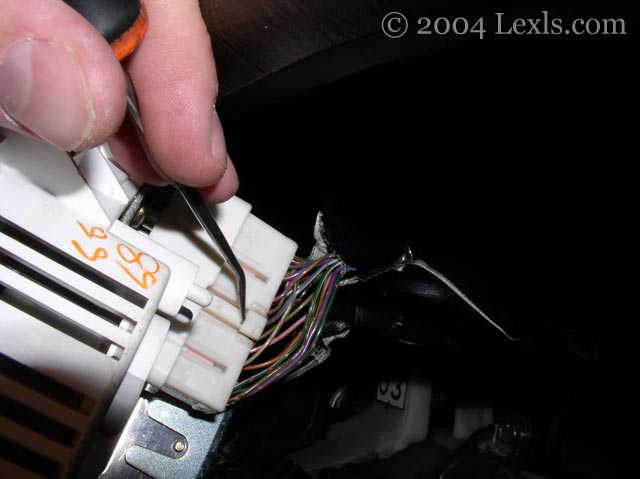
10) Push down on this tab with a thin flat-head screwdriver, not a needle point like I used for this picture, to unlock connector "B." While pushing down pull the connector out. Do not pull on the wires! Again, if you push down on the connector tab at the right angle you can also push it out, just be careful.
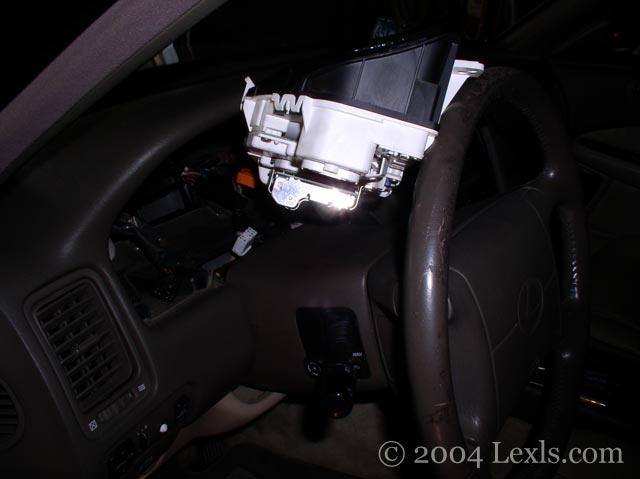
11) Position the cluster like this. Use the same procedure in step 10 to remove connector "C," the smaller white connector that is already removed in this picture.
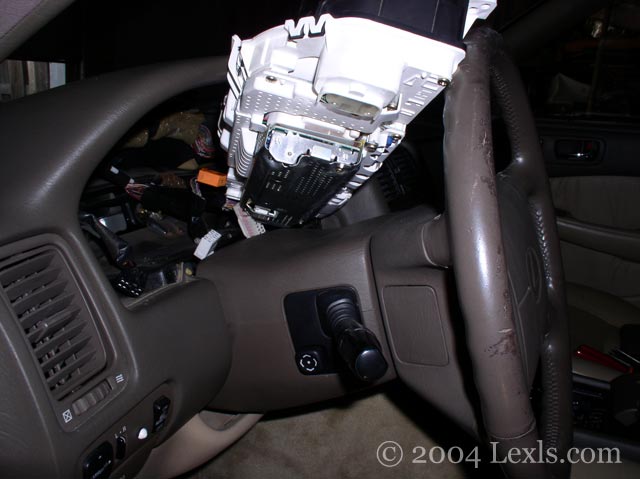
12) With connector "C" removed you can position the cluster up like this. Use the same procedure in step 10 to disconnect the orange connector, connector "A."
13) Carefully remove the cluster.
Note: If you start the car with the instrument cluster disconnected your air bag light with stay on. Here's how to turn it off.
If you found this information useful please support the site by clicking the button below and making a donation. Thank you.
