How to Check & Replace the Air Filter
1990-1994 Lexus LS400
This is a good place to start if you're just getting into DIY auto. It's ultra easy and gets you working in the engine bay a little. Removing these covers needs to be done for many procedures so this is sort of a gateway tutorial. The air filter should be inspected every 6 months and replaced every 36 months. Of course you can also replace it if it's really dirty. A dirty air filter will reduce your MPG so it's good to check it, a new OEM filter will cost $15-$20.
Tools Needed:- Phillips screwdriver
- 10mm socket
- Vacuum or air compressor (optional)
- Air Filter (use tool to check product fits), OEM = 17801-50010-83

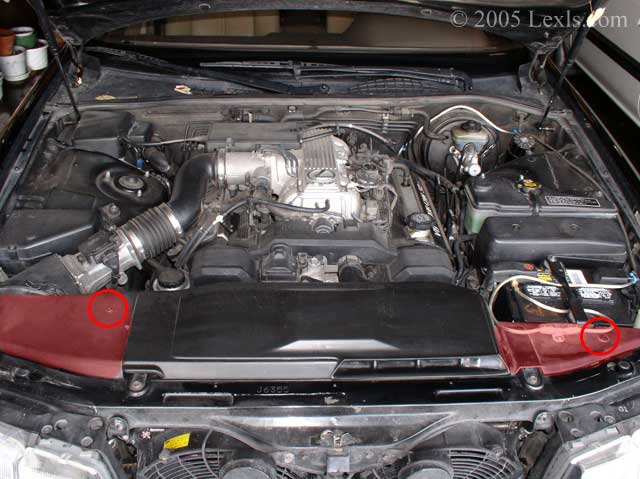
1) Unscrew the screws circled in red, then remove the covers highlighted in red.

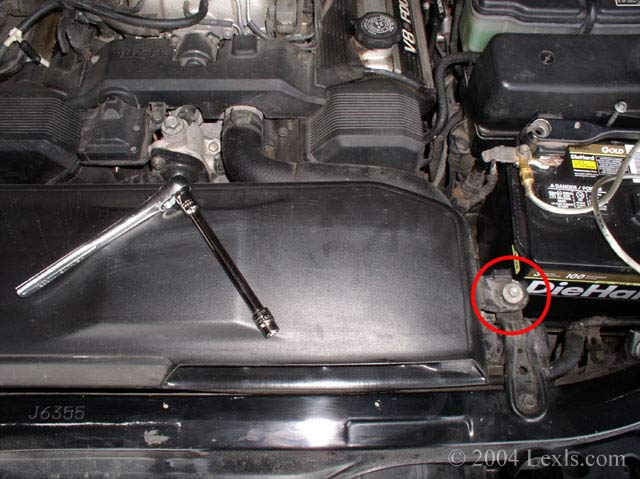
2) Remove this 10mm bolt, then remove the cool air duct.

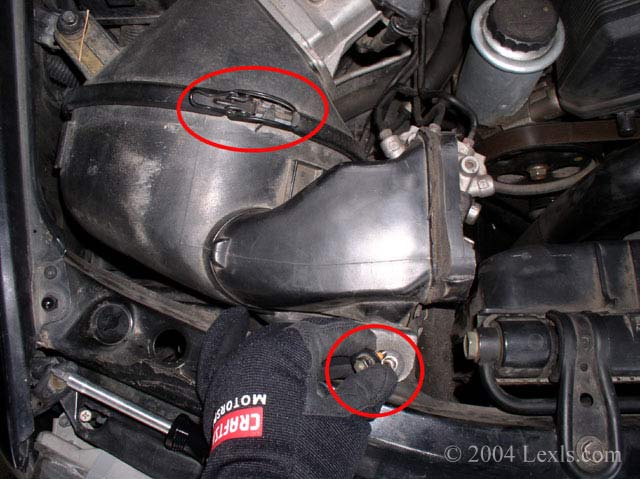
3) Remove the circled 10mm bolt, unclamp, and remove the air filter holder.

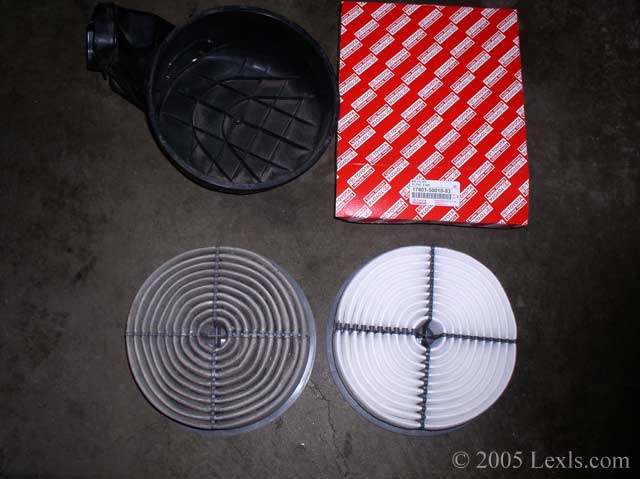
4) Remove the air filter from the holder and inspect or replace it. In this pic you can see my ~3 year old filter vs the new one, part #17801-50010-83. If it looks really dirty then replace it with a new filter. If not, just shake out any big debris and then use compressed air to blow air through the filter; dirty side facing away from you! This will get some of the dust out. You can also try vacuuming it.
5) Install is the reverse of removal. Write down in your records the date and mileage of your air filter change.
If you found this information useful please support the site by clicking the button below and making a donation. Thank you.
