How to Install a Daizen Front Polyurethane Control Arm Bushing Kit
1990-1994 Lexus LS400
New bushings can do a LOT for your car. They can help restore a "new car" feel, reduce or eliminate clunks when going over bumps, improve handling, make your car safer, and more. It sounds amazing but I have found it to be true. You can read a great write up about bushings here on the Daizen website. The Daizen front control arm kit (P/N L1-2002) sells for about $100 plus shipping from one of several Daizen dealers.
It's a great price for all the improvements it offers, but the downside is that it takes a quite a long time to install the kit. From what I have read it takes at least 12 hours of labor for a qualified mechanic. So, depending on shop rates, you're looking at $600+ just for the labor. You can DIY but this is very difficult work. You should not attempt this unless you've got all the tools and have the mechanical skills required. Daizen recommends this install be performed by a qualified mechanic, and so do I.
Now, I'm not a mechanic but I wanted to give it a try and learn. I did get the kit installed but it took me two very full days since I did not have time to do both control arms at once. I would have saved a few hours if I didn't have to assemble/reassemble twice. I did the upper bushings one day which ended up taking about 9 hours including breaks, figuring things out, busting rusted bolts, and taking tons of pics for this. I did the lower bushings a week later and they took about 9 hours as well. Both arms were very hard to install since I do not have a hydraulic press. Even with a press, plan on 5-8 hours per side depending on your ability and pace.
Tools Needed:
- Hydraulic press (not required, but it would be VERY helpful)
- Strong workbench with large vise
- Propane torch (~$10 @ Home Depot) - A must have
- Lighter or spark
- Old thin knife you don't mind tossing after you're done
- Thin flat-head screwdriver
- Pliers with rubber coated handle (something to grip the control arm while you're torching it)
- Hacksaw
- Pry bar
- Hammer
- Torque wrench
- Plus all tools in the tutorials associated with this
Parts/Supplies Needed:
- Daizen front control arm kit (P/N L1-2002)
- Shop towels
- WD-40
- Medium & fine grit sandpaper
- Leather gloves
- Eye protection
- A good hand cleaner for when you're done, you will get greasy.
Part I: Remove the Control Arms...
1) Remove the front lower control arms, steps 1-12.
2) Remove the front upper control arms, step 3.
Part II: Remove the Stock Bushings...
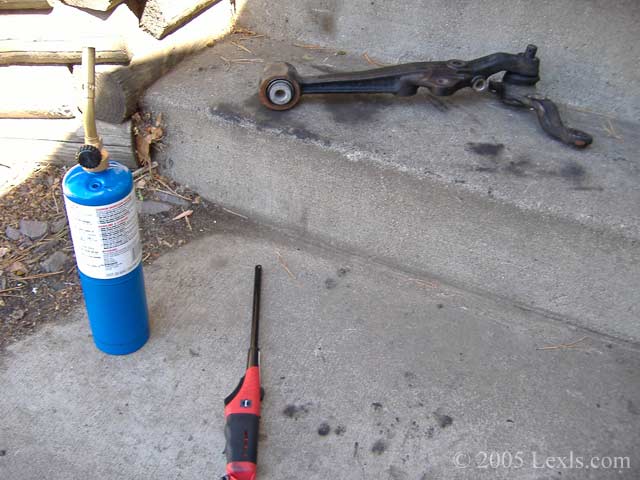
3) Find a good area to work and assemble tools for torching. What you'll want by you are the torch, lighter, rags, knife, and pliers. Wear gloves. You need to have an area that won't get burned or start on fire from the heat. A thick scrap piece of plywood would work if you don't heat the wood directly and are careful. I used my stairs but I DO NOT recommend doing this anywhere that sees a lot of use. The main reason is that the char and melted rubber tracks everywhere and is extremely hard to remove. Choose your torching area wisely.
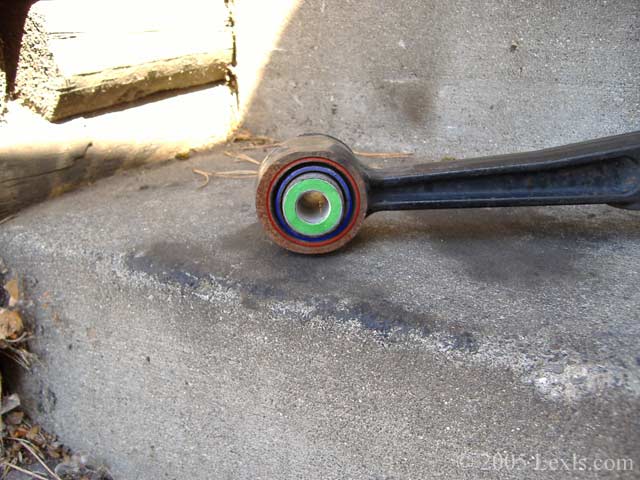
Here's the stock lower control arm bushing. Keep the outer and inner pieces, they will be reused. The middle piece, highlighted in blue, is what you will discard.
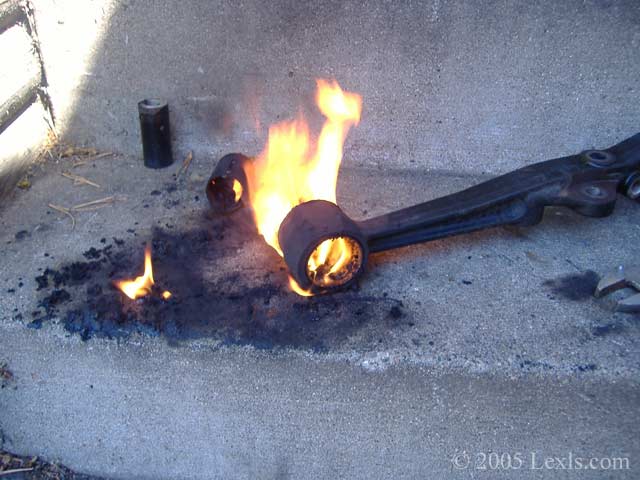
4) Wearing gloves and eye protection, light your torch and apply the flame to one side of the bushing. Heat the bushing until it starts melting. It will take around 5-10 minutes of heating before you see it melting so be patient. You'll know it's really melting when you've got a flame like this! Once the rubber starts melting you'll want to use your knife to help it out. Most importantly, you want to push out the inner and middle sleeves (you can see both out in this pic). When the sleeves are out keep using your knife to remove as much rubber from the outer sleeve as you can. When you've got most of it out use your pliers to set the arm and inner sleeve aside and let them cool off. Repeat for the other lower control arm.
IMPORTANT: DO NOT TOUCH THE ARM UNTIL COOLED!
5) If you have a press: For the upper control arms you need to remove the entire stock bushing. This is where a hydraulic press would be very useful. If you have a press then press out the entire stock bushing. If you don't have a hydraulic press like me follow steps 6-9.....

6) If you don't have a press: You're going to have to do some more torching. But before you do, use a thin flat-head screwdriver and remove the 4 dust caps on each upper control arm.
Side: You can use whatever method you want to get the stock bushings out. You may be able to get them out using a pry bar and hammer if you have a strong vise and workbench to hold the arm in place. I tried a 2-jaw puller, but mine was too big and kept falling off. Do what works for you.
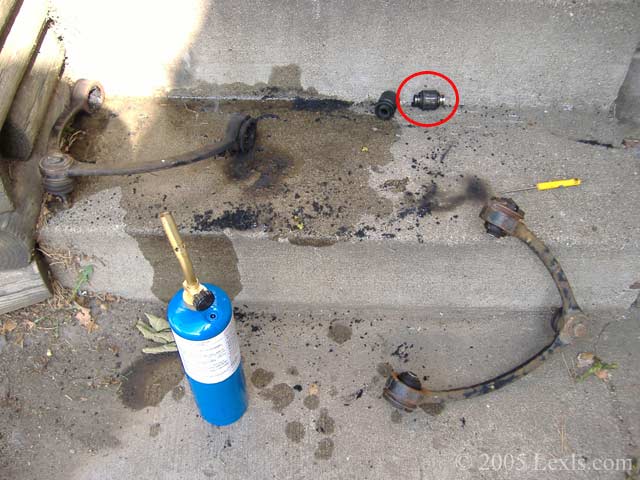
7) Torch the bushings and push out the center (circled above) with your knife. Use the same method as step 4. Remove the 2 centers for each arm. Again, DO NOT TOUCH UNTIL COOLED!

8) I tried everything I could think of to get this beast out of the arm but it just wouldn't budge. So I decided the only way I would get it out was to cut it out. First I made two cuts in the curved part using a hacksaw.
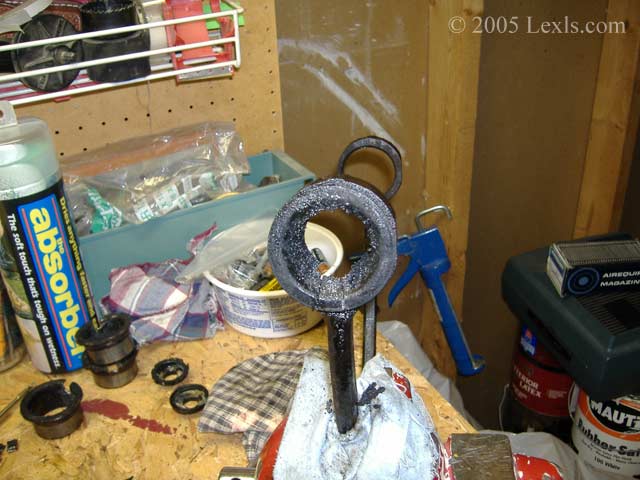
9) Next I followed the cuts though the center. Now, you have to be very careful not to cut into the control arm!!! I cut almost into the arm and then was finally able to muscle it out using WD-40, a pry bar and hammer. Repeat for all 4.
Part III: Clean the Control Arms...
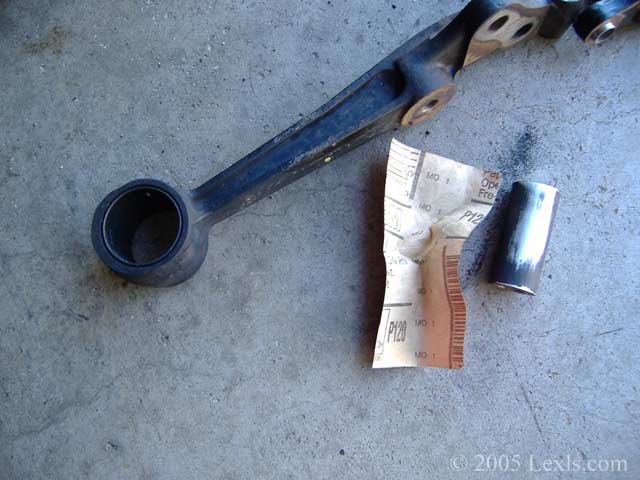
10) First use a blade to scrape off/out as much rubber as you can. Next move to a medium grit sandpaper to remove the remaining rubber. After all the rubber has been removed you should see bare metal. Finally move on to finer grit sandpaper to smooth everything out. The inner sleeves of the lower control arms and faces must be complete clean of all dirt, rubber, corrosion, etc.
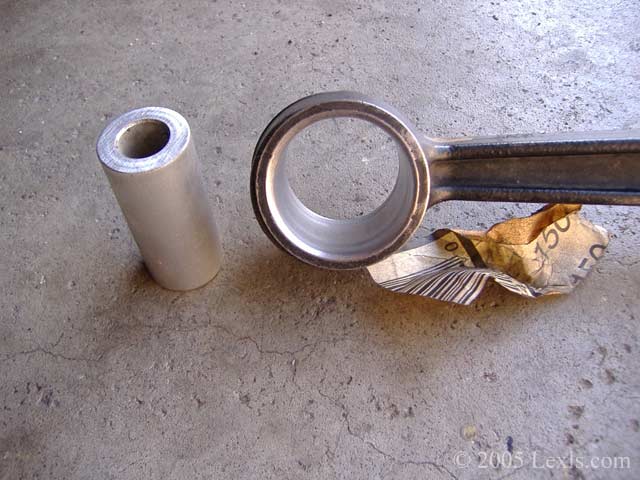
Here's the lower control arm and inner sleeve cleaned up.
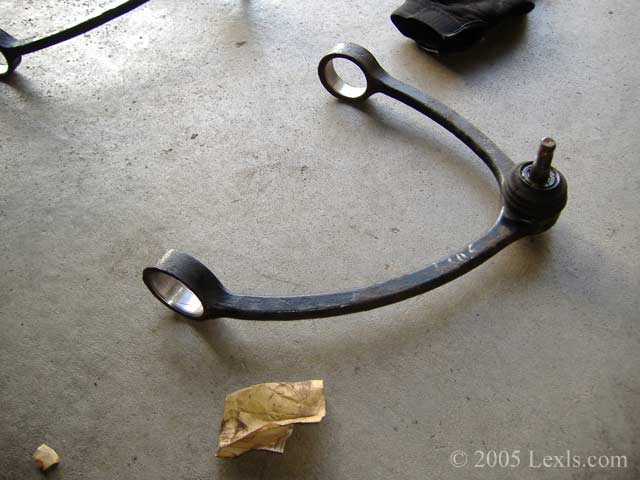
11) Repeat step 10 for both upper control arms. Since the entire stock bushing was removed the cleaning won't be as bad. Just smooth things out and make sure the sides are clean too.
Part IV: Install the New Bushings...
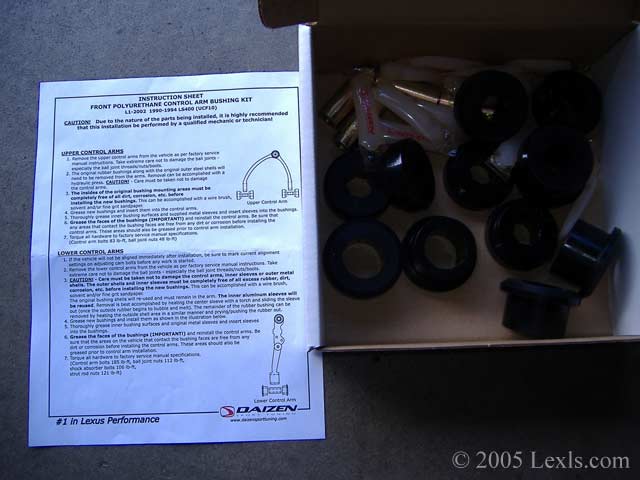
Here's what comes with the Daizen kit. 6 bushings total (in halves), 4 metal sleeves for the upper arms, tons of grease, and basic instructions.

12) Grease the new bushings and install them into the lower control arms. I used about one tube of grease for each bushing half. You want the bushings to be fully covered in grease. Push the bushings into the arm and then push the inner sleeve in. Before installing them on the car also grease the area where they fit on the car. Hint: This would seem like an easy step but it was quite a tight fit. I couldn't get the bushings to fit together totally flush so I just barely managed to install them on the car. I realize now that my main mistake was that I didn't do a dry fit. If it doesn't fit dry it's not going to fit with the grease. I think if I made the inner sleeve 0.5mm - 1.0mm less in diameter it would have been much easier. So, dry fit first, if it doesn't fit sand more off. Doing this will save you a lot of pain!
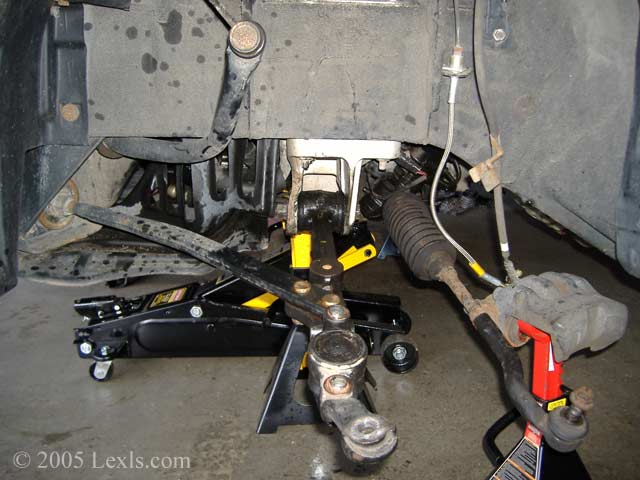
13) Install the lower control arms on the car. The nut for the arm goes toward the front and the bolt goes in from the back. I did get both in but it wasn't easy!

14) Repeat step 12 for the upper control arms. These were an absolute perfect fit, no problems. Just use plenty of grease. Once you've pushed them in and you've got the inner sleeve in grease the outer faces too.

15) Install the upper control arms on the car. Torque = 83 ft-lb (113 Nm).
16) Install of the front lower control arms is reverse of removal.
Review: Feels like a new car! Even though I had newer UCA's before installing these bushings the suspension still didn't feel tight like a new car. I didn't have any clunks either because right after buying the car I spent over $2K on the front suspension. It's been about 2.5 years since then but I basically had new stock front suspension. Installing these bushings is like night and day. It really tightened the front end up. It was definitely worth the effort. What Daizen says on their website really is true. All I can say is that I'm impressed. I can't wait for the rear control arm kit!
Notes: Not doing a dry fit was my first big mistake in this install. Forgetting to mark one of the camber adjusting cams was another. If you don't mark the cams and put them back in exactly the same place you're going to need an alignment after this install. Learn from my mistakes!
If you found this information useful please support the site by clicking the button below and making a donation. Thank you.
