Removable Star Wars Yoke Base
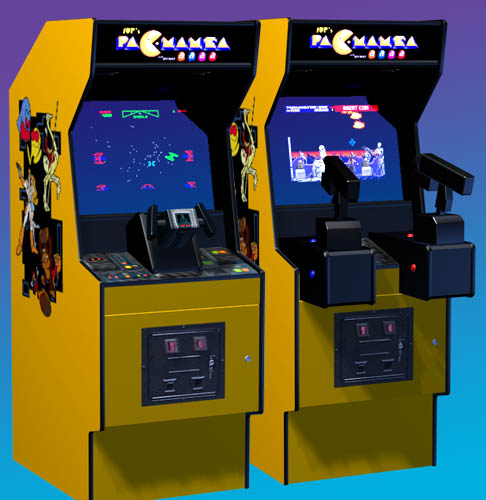
This is the removable Star Wars yoke for my final
control panel, which will be a modular design, also featuring dual
removable T2 guns!
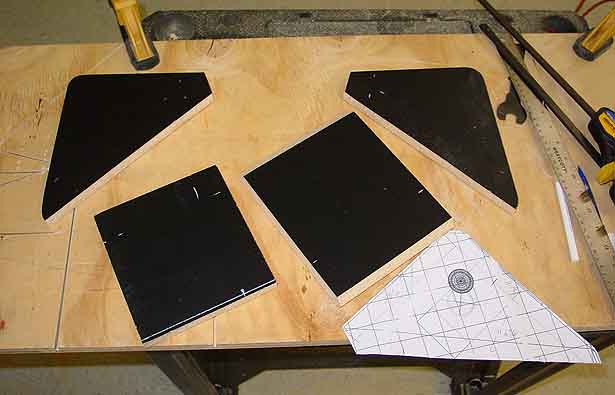
Here are the parts used. Once
again, I printed out a full-size template which aided in construction.
I tried to make as few cuts as possible. The two triangular side
pieces were cut off the corners of the left-over melamine from my cab with
a single diagonal cut, and another small cut on the back corner of each.
The top and front corners were rounded using a plane.
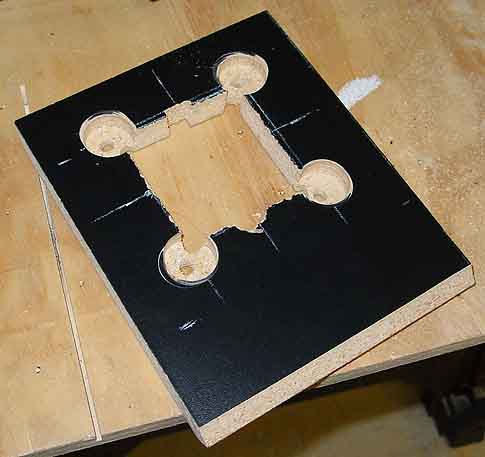
The front panel is where the yoke is
mounted, which requires a square hole to be cut, and 4 holes drilled.
Since the yoke's bolts are very short, the wood behind each mounting hole
had to be drilled out to 1/4" thickness with my 1-1/8" forstner
bit (normally used for pushbutton holes) to allow the nuts to fit.
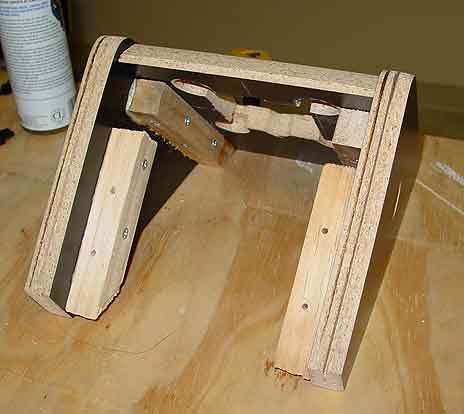
Here the base is assembled, minus the
back plate, using cross-drilled 1x1s, urethane glue, and 1-1/2" wood
screws.
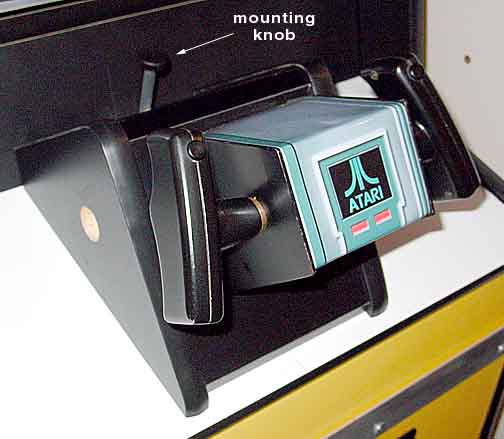
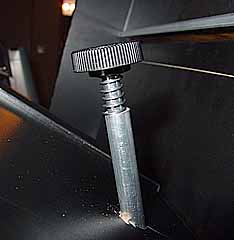
This is the nearly finished base and
yoke, with iron-on melamine edging and t-molding installed. Still
missing two Happ pushbuttons (one each side.) The 1/4" mounting
bolt goes down thru a metal pipe that guides it thru the back of the
wooden base. The tube fits so tight in the base that I had to tap it
in with a hammer. The angled 3/8" hole was drilled by placing
the yoke on the drill press platform and drilling slowly. The
5-1/2" bolt has a plastic cap (commonly avialable in the fasteners
section at Home Depot, in the little specialty drawers) that fits tightly
on the head (also tapped in with a hammer) so it can be hand-tightened
into a tee-nut fitted under the CP.
The bolt has a small spring that
pushes it up when loosened, which means that when I set the base down on
the CP, the bolt is only poking about 1/8" from the bottom of the
base. This also allows the tip of the bolt to drop down into the
mounting hole 1/8" for easily locating the hole, but doesn't really
scratch the lexan since the only thing pushing it down is the weight of
the bolt itself.
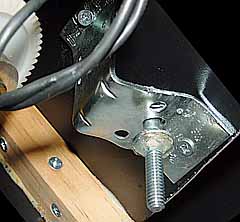
A washer that is hot-glued to the bolt
keeps it from accidentally falling out and getting lost. The metal
bracket keeps the metal guide-tube from being pushed farther out the
underside of the base when the knob is tightened.

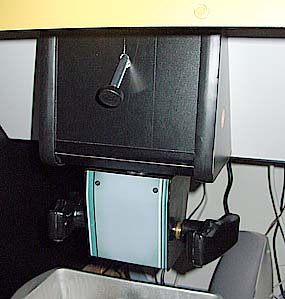
The hole at the top is where the bolt
goes down thru the CP into a tee-nut mounted underneath. This will
have a metal insert to make the hole pretty, once artwork and Lexan are
mounted. At the bottom is a 5/8" hole where I will be mounting
the end of a USB extension cord, running back to the USB hub inside the
CP. For now, the yoke's USB plug runs thru the hole directly down to
the hub. The hole will be capped with a hacked pushbutton top when
not in use.
Note that since the base is pressed
firmly against the back panel and the control panel, it can't come loose,
or rotate sideways, or be rocked away from the CP. In fact, it
connects so tightly, it even stays put when the panel is rotated
upside-down!
I'm one step closer to finishing my
cab! All that's left is to build the dual Terminator 2 gun platforms,
and add the artwork and Lexan to the 3rd panel...
|