Thanks to http://www.belchfire.net for the host and
the help.
Theme
sites:
http://www.belchfire.net
http://www.themexp.org
http://www.getskinned.org
|
|
|
Boot Editor |
|
Boot Editor Download
link: What it
is Screenshots: |
|
Latest version 1.0.1 For bugs, requests... my e-mail is: nicknameat@hotmail.com FIRST
OF I am not
responsible for any damage that this program perhaps do in yours PC by using
it. Use it at your OWN risk. Also The dll and ocx files inside
the zip file, can be placed to system32 folder (it is better to put them
there). For the AxImage.ocx file, if you change the folder
where the program is installed then you must register that file again. So, go
to Start – Run, type there “regsvr32 <programs’ path>\AxImage.ocx” and
hit the Ok button. If you have the AxImage.ocx file to system32 folder there
is no need to register it again. What it is ·
It’s an editor for creating boot screens (in zip format) for WinXP
(Pro or Home edition – must work in 2003 server and others) What it does - Features ·
Creates a zip file (extension .bootscreen) with the pictures you want
and an ini file with all the infos about the boot screen (very small size –
about 50 KB each screen). This zip file can be handled by BootEditor directly and LogonUIBootRandomizer ·
Can change the default palette of boot screens ·
Can change vertically the position of progress bar. ·
Can batch convert old file
format (.exe) to new file format (.bootscreen). OLD VERSIONS – before 1.0.1 ·
Creates boot screens (the final exe) ·
Can also change the default palette of boot screens ·
Can change vertically the position of progress bar. ·
It's totally free How it works ·
Program creates a zip file (extension .bootscreen). Inside this are
all the bitmaps you want and an ini file that has all the infos about the
boot screen. ·
Program can handle this zip file (no need for extraction). ·
How it works – What you must know (some infos are for versions prior to 1.0.1) ·
When program starts creates a copy of yours original ntoskrnl.exe file
(located in system32 folder) inside programs’ folder. After that will try to
find the position where the default palette is, inside ntoskrnl.exe file (for
that reason, the ntoskrnl.exe file must exist in system32 folder and be the
original one). If program can’t find the palette (or the ntoskrnl.exe file),
a message will pop up. If you see that message, don’t use the program but do
this: Copy the original ntoskrnl.exe file (find it from the CD) inside
programs’ folder (replace the one there, if exist). If you have problems,
e-mail me. ·
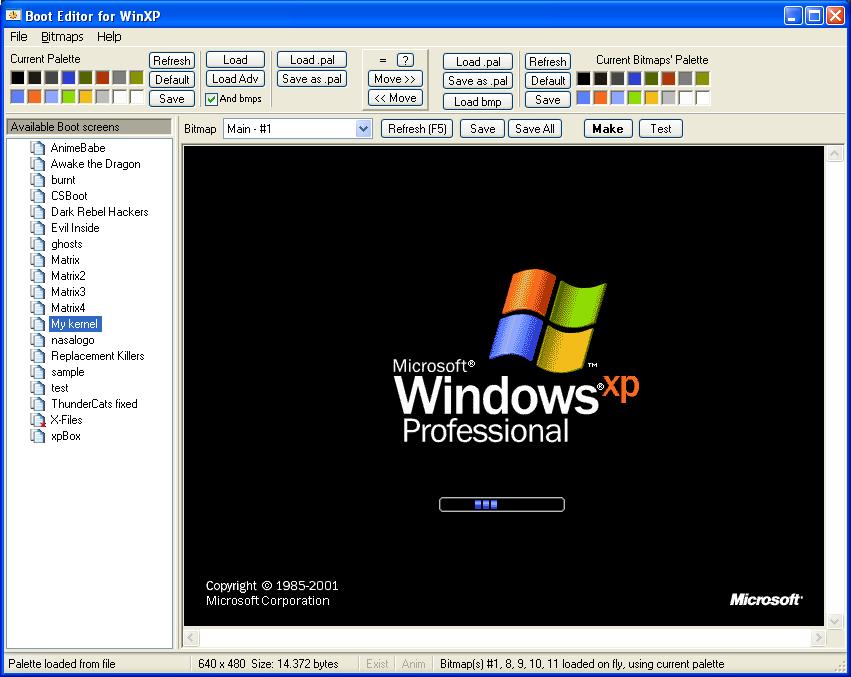
In the left side there is a tree view control. That tree contains the
subfolders under the base folder where you keep your new boot screens (In
order to set the base folder go to menu Bitmaps – Options). That base folder
can be the folder where you have all the boot screens you download BUT I ·
At the top side there are 2 areas (the left and the right). In the
left area there is the default palette (usually that palette is the one that
is inside ntoskrnl.exe file). The right area is relative to the palette that
the active bitmap uses. Both areas have buttons relative to the palette. In
the middle of 2 areas there are 3 buttons to interact one palette to with the
other. ·
Program always working with TEMP bitmaps. If you want to save a bitmap
you must press the save (or save all) button, in order to use that bitmap
again. When you are working a boot screen (folder), program holds in memory 5
bitmaps [Main #1, Progress bar #8 (Pro), Overlay #10 (Pro), Progress bar #9
(Home) and Overlay #11 (Home), with names pic1.bmp, pic8.bmp, pic10.bmp,
pic9.bmp and pic11.bmp inside programs’ folder]. You can make any change to
that bitmaps without saving them (program holds the changes in memory). If
you select an other boot screen (folder) from the tree in left side of the
program, all the 5 bitmaps where working before will be lost, but you will
see a warning message. If you want to save that bitmaps, must before
selecting an other screen (folder), to press the save (or save all) button.
To avoid some problems here, the program can create backups of the 5 bitmaps
(go to Options dialog in order to set the number of backups). The names of
backup files are the same as the 5 bitmaps and extension .bak, .bak2, .bak3 …
and are located inside programs’ folder (use this if you want to restore
something). ·
When you save a bitmap, program makes a copy of that bitmap inside
current screen (folder), the one that is selected in the tree at left side of
the program. ·
Again, at ·
At last, use the tool tips (there are almost in every button) to see a
small description of the action. ·
Extract the zip file to a folder. That's all... ·
(Requires msvbvm60.dll. If you don't have it, you can find it
everywhere in the net or here) ·
(Also requires comctl32.ocx. If you don't have it, you can find it
everywhere in the net or here) ·
Go to Help - Uninstall ·
Delete programs' folder |