How to Install Stainless Steel (SS) Brake Lines
1990-1994 Lexus LS400
This is a mod for those who want improved braking performance but don't have an extra $1-2K to spare for a full big brake upgrade. The manufacturer claims that by installing stainless steel (SS) brake lines you will reduce or eliminate a "mushy" brake pedal and "significantly reduce stopping distance." I found this to be TRUE! Now, I'm not into racing but I consider this mod to be a major safety upgrade. Not only does the brake pedal feel less mushy, I also feel that I can stop on a dime. It's not like having the factory lines is bad, it's just that this is much better!
You can get the Goodridge SS brake line kit from LuxuryMods.com. I think you really get a lot for your money with this mod. The lines are different for 90-92 and 93-94 LS400's so you need to specify what year LS you have when ordering. This tutorial is based on my 1991 but install for 93-94 LS400's will be very similar.
Tools Needed:
- Breaker bar or impact wrench
- Box wrenches
- Flare nut wrench set
- Sockets, socket wrenches
- Pliers
- Jack
- 2-Ton jack stands
- Wheel chocks
- Torque wrench
Parts/Supplies Needed:
- Goodridge SS brake line kit
- Shop towels
- Drip pan
Basic Install Procedure
1) Jack up the car and place it on 4 jack stands.
2) Remove all 4 wheels.
3) Remove a factory rubber brake line and install a new SS line. Repeat for the other 3 lines.
4) Bleed brakes & check for leaks.
5) Put the wheels back on and remove the jack stands.
6) Go for a test drive & check for leaks.
1) Loosen the lug nuts and then put the car on jack stands, remove all the wheels.
Instructions for the rear lines....

2) Pick a line to start with, it doesn't matter which one because they all will be replaced. Highlighted in red in this pic is the brake line to remove. Note the routing of the factory line because you will need to run the SS line the same way. Place a drip pan under the line and caliper because brake fluid will drip out. In addition to the drip pan you'll want a bunch of shop towels to clean things up with.
***Remember, do not get brake fluid on any painted surfaces because it eats away at it!***
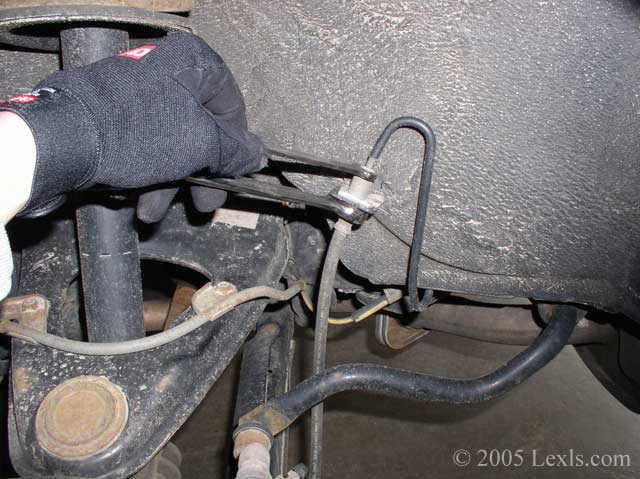
3) Disconnect the 10mm bolt that holds the brake line to the brake tube. You will need a 10mm flare nut wrench on the top bolt and a 17mm wrench on the bottom. When you do this the wrenches will be spaced out a bit for your hands but in this pic I'm just holding the wrenches to give you an idea.
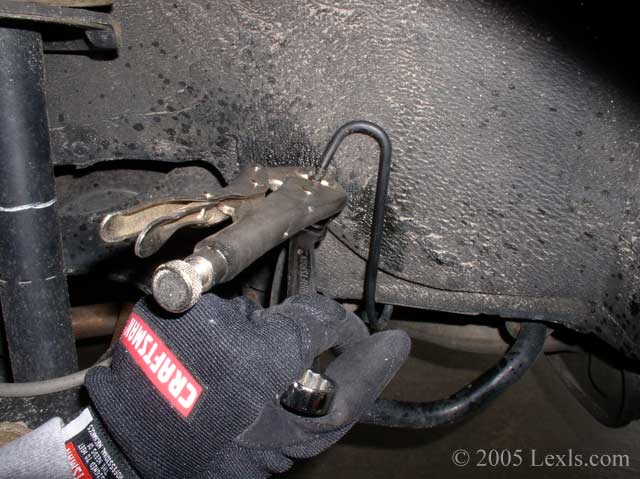
If you use a flare nut wrench for the top nut you probably won't have this problem...but if you don't you might find that 10mm bolt is probably going to be stuck on there pretty good....chances are the wrench will strip the bolt so you'll need some more power. I used a big locking pliers along with the 17mm wrench and the bolt cracked fairly easy. Once you've cracked it slowly unscrew it, at this point brake fluid will drip out of the connection.
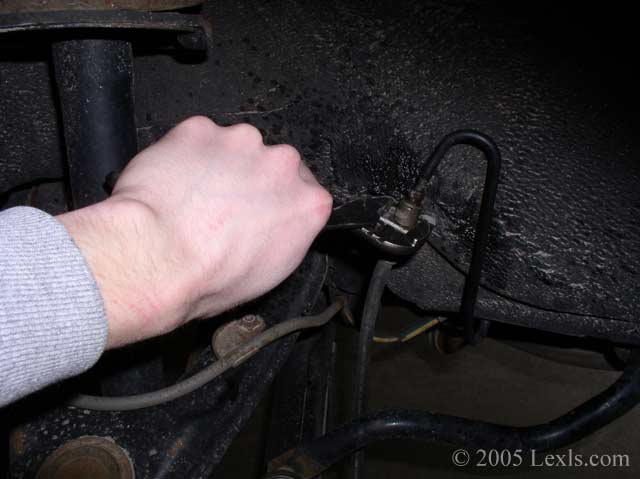
4) Remove the brake line clip with an adjustable pliers.
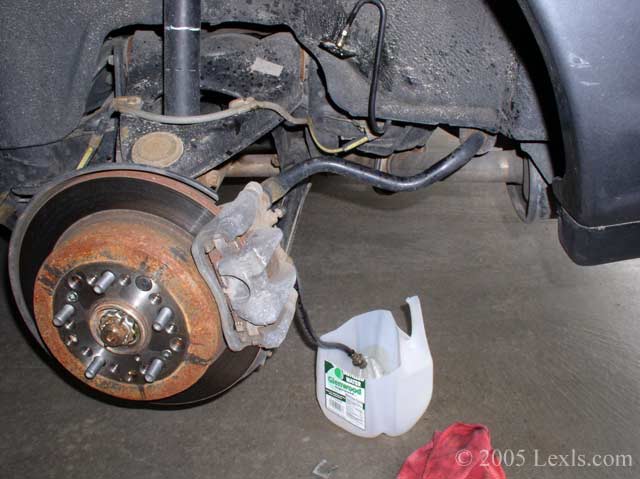
Place the line in the drip pan once you get the clip off. Position the pan under the brake tube too because it will slowly drip brake fluid.

5) Using a 17mm wrench, remove the brake line from the caliper.
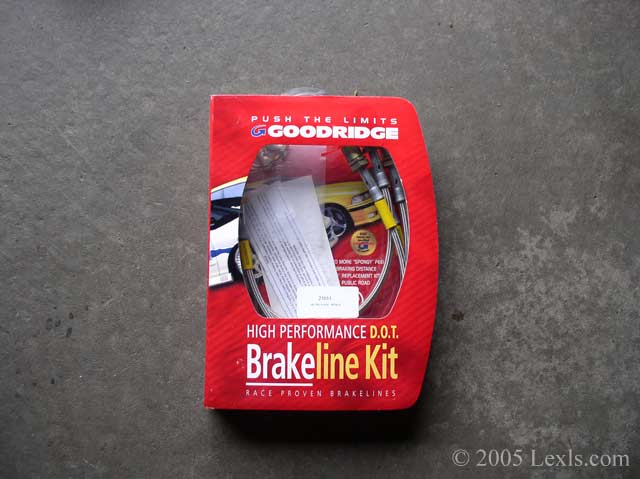
Here's the kit. You can get it from LuxuryMods.com. Remember to specify what year LS you have when ordering.
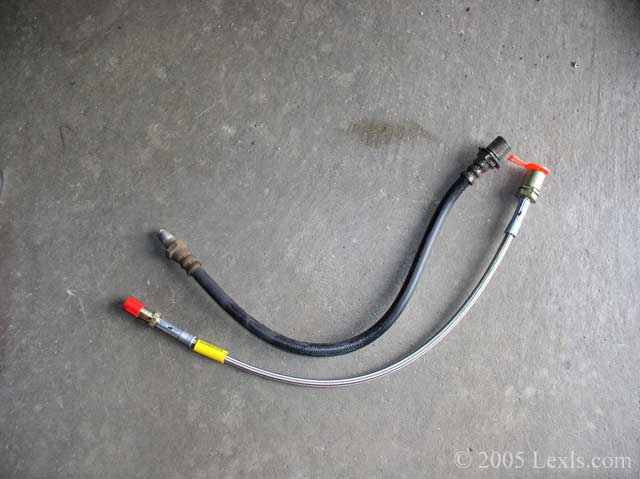
Factory line vs. SS line. The Goodridge line is just a bit longer.
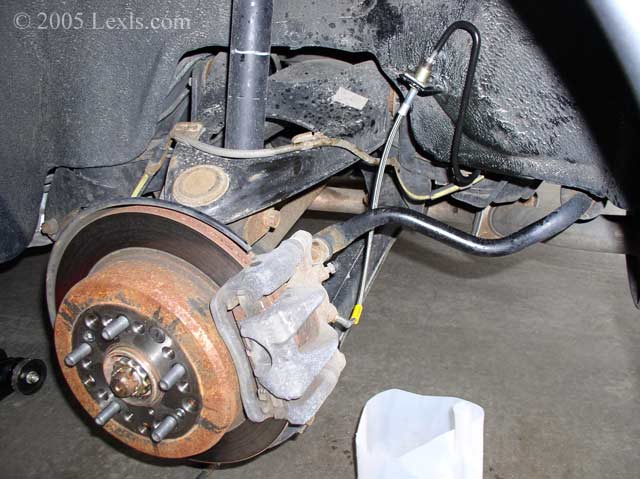
6) Install the new line. Make sure the connections are clean and then install it on the caliper first using a 13mm wrench, torque it to 17 ft-lb. Then bring the line behind the rear sway bar, thread it through the holder and attach the clip. The clip may require a little bending to make it hold. Screw down the 10mm bolt and torque it to 11 ft-lb. Basically, just make it tight but don't over do it.
Check the brake fluid reservoir and top it off if needed.
Your rear line should look close to the pic above. One down, 3 to go!
Instructions for the front lines....

FL brake line highlighted in red.

7) Remove the clip.
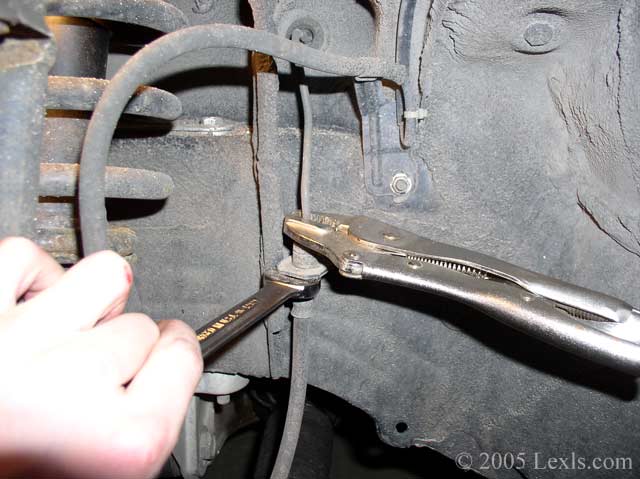
8) Start with the top and remove the 10mm bolt just like you did with the rear line, again use a flare nut wrench before going to a locking pliers. Then remove the 14mm bolt that holds the brake line on the caliper. A lot of brake fluid will drip out of the front calipers so be prepared.
Note: My FR line gave me a TON of trouble! It took me forever to remove the bolt even with the locking pliers. Then, when installing the SS line the top bolt would not thread. It probably took 2 hours......yes...argh!!! Eventually I got it on. I'm telling you this because you need to plan for this taking a while. Yeah, it's simple and probably won't take long but just in case you run into a stubborn bolt like I did you'll have time to deal with it.
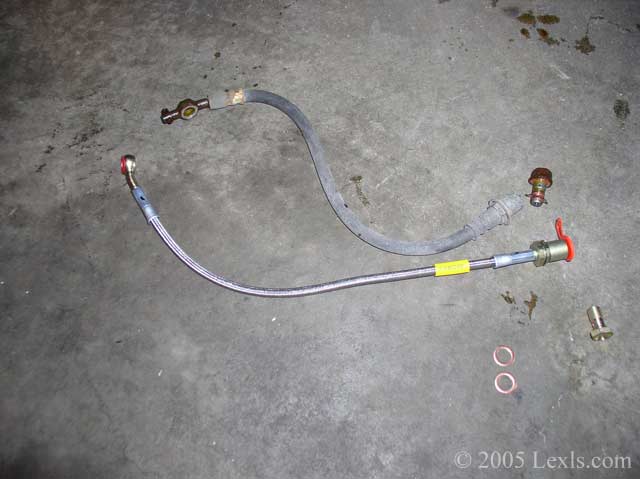
Factory line vs. SS line. The new bolt and crush washers come with the SS brake line kit.

9) Install the new SS line on the caliper first. Use the new crush washers on either side of the brake line as shown in this pic. The line should be angled in towards the car and pointed up as the factory line was. Torque the 14mm bolt to 22 ft-lb.
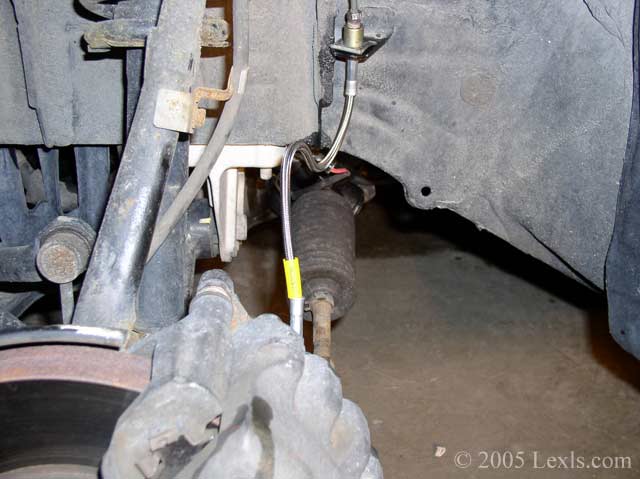
10) Run the front SS line as the factory line, it should look just like this pic. You don't want any major twists in the line either. The top fitting only fits one way so make sure everything lines up right. Then replace the clip and torque the 10mm bolt to 11 ft-lb.
Check the brake fluid reservoir and top off if needed.
11) Once you have all 4 SS brake lines installed bleed the brakes to remove all the air in the system. While doing this check for leaks.
12) Put the wheels back on and take the car off the jack stands.
13) Go for a slow test drive on an empty road to make sure you can stop. Stop and check for leaks at the line fittings. Now try a few harder stops to see the results.
Enjoy the improvement!
If you found this information useful please support the site by clicking the button below and making a donation. Thank you.
