How to Change the Instrument Cluster Lighting Colors
1990-1992 Lexus LS400
These are the instructions to change the bulbs in your 1990-1992 Lexus LS400 instrument cluster with much brighter and longer lasting LEDs. Note: you will lose the ability to dim the dash at night, but it's well worth the sacrifice.
Before you begin it is very important that you read this before you do anything and don't jump ahead before you read what's next, much time and effort went into making this a piece of cake for you. If you follow these instructions word for word this conversion will be as easy as boiling an egg. Take your time and don't rush, you are doing this yourself and there is no time limit, remember that. Read this first and than read it again as you do the conversion so you know what to expect. See below for tools, supplies, and parts you will need. You also want a nice sized desk/workbench to lay all your parts and screws.
Tools/Supplies Needed:
- Needle nose pliers
- Soldering iron
- Solder
- Electrical tape
- Glass cleaner
- Crazy glue gel
- Scissors
- Exacto knife
- Flat and philips screw drivers
Parts Needed:
- (2) FLB series 18-LED Flexible Light Bars
- (1) #74 Wedge Base LED bulb (for the odometer)
- (18) twist lock type T1.5 Instrument LED bulbs in any color you want. You can pick the colors you want for park, reverse, drive, etc to be with a colored LED bulb.
- 26 gauge stranded wire in black and red color
- Plastic colored file folders {blue, red, green, whatever you like} (office supply stores)
- 12 volt 300mA adapter or spare 12v car battery (for test bench power supply)
1) Remove the instrument cluster from your car. Make sure your battery is disconnected before you remove the cluster or the air bag light will be on when you put everything back together and start the car. If you forget see this tutorial on how to turn the air bag light off.
2) Disassemble the instrument cluster.
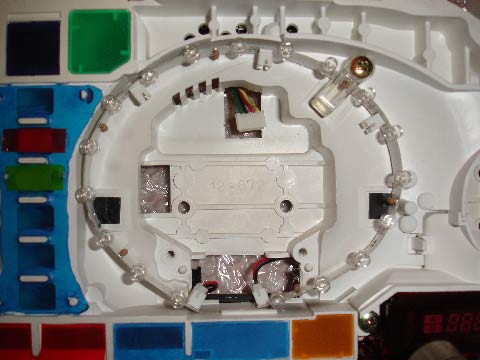
3) With the cold cathode tubes removed you can now install the LED strips. Gently bend the flexible LED strips and place them where the cold cathodes once rested. The LEDs have little connectors on each end that must face toward the power source unit. Make sure not to bend these strips more than you have to because it is there own tension that will help hold them in place. Screw down the top using the old screw and plastic piece.
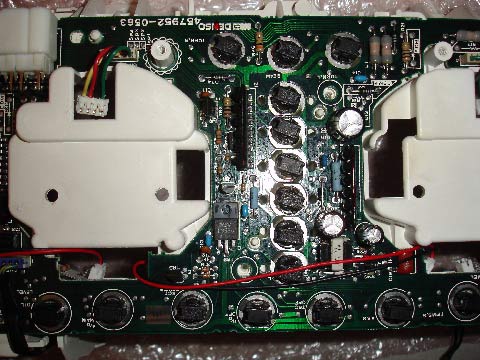
4) Plug the jumper cables into the LED strips as shown and make sure the wires run like so. One jumper will connect the two LED strips together using the inner connections on the LED strips. The second jumper connects on the left and will soon be connected to power. It's a good idea to wrap the sections of wire with electric tape where they go through the circuit board hole so they don't scrape the edges.
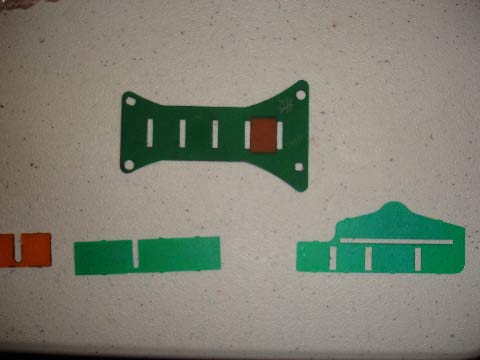
5) While you are here, you may also want to change the colors of your warning and drive indicator lights (ex. park, reverse, low coolant, antilock, o/d off, etc). Changing the color is done by removing the stock color plastic piece the light shines through and replacing it with a colored plastic piece of your choice. You make this from a colored plastic file folder your local office supply store carries. Trace the new plastic piece out using the the old plastic as a stencil. Use a sharp scissors and/or an exacto knife for those really small cuts. If you want multiple colors for the shift lights (see next step) use a little crazy glue {the gel type} to hold the plastic in place, just a small drop in each conner will be enough, don't over do it or you will mess up you newly cut plastics.
LexLS note: The lens (part with the numbers on it) is painted black on clear and white colored plastic, with the exception of the red dashes on the temp gauge and rpm gauge. All bulbs are also white/clear. This means the plastic pieces in this step are the only thing that gives the lights color. You can make the light even stronger by using the same colored LED as a light source.
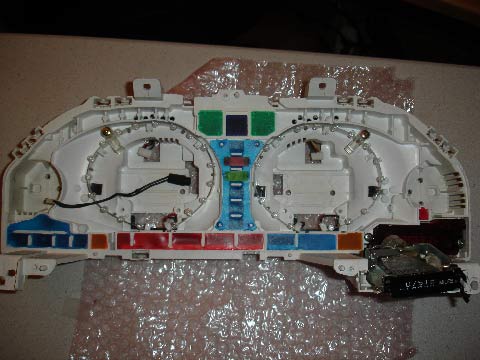
6) Install the new plastic pieces. Now set this part aside and let it dry and discharge yourself because it time to get the power supply.
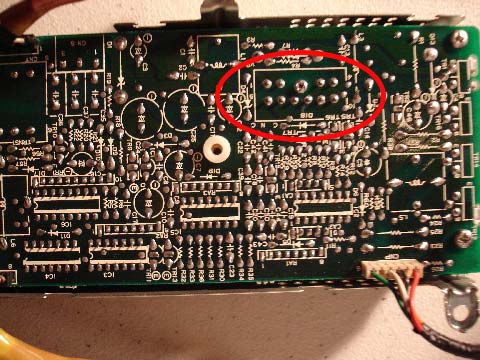
7) The power supply will have a dark tan piece of protective plastic that is held in place by one screw, remove the screw and plastic and set it aside. Locate the white rectangle in the upper right hand corner marked D18 because this is where you will solder two wires to power your LED strip.
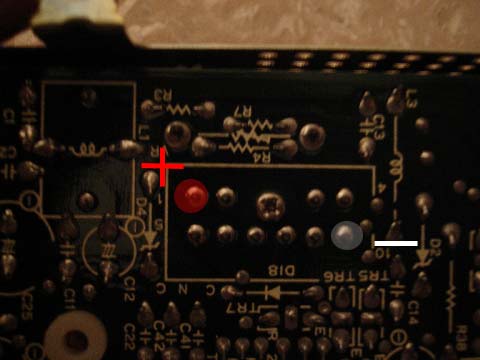
8) Solder a 1 foot long 26 gauge stranded red positive wire to the solder point highlighted in red above. Then solder a 1 foot long black negative wire to the solder point highlighted in white above. The color doesn't really matter as long as you know which is which. Note that these points are the opposite from the power terminals in the disassembly tutorial. Put a little electrical tape over the solder points after the wires are on. Now put the tan protective plastic back on. Set power source unit aside.
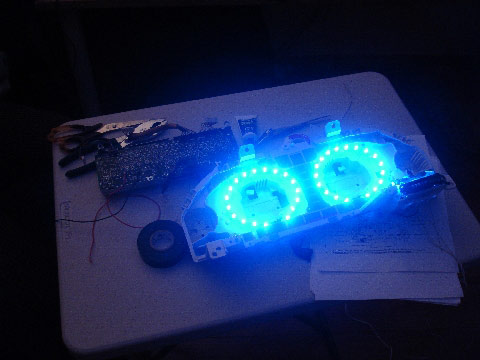
9) Test the LED strips to see if they both light up by connecting the positive/negetive wires to the corresponding wires on the power source, power the power source with your 12v adaptor or battery. LEDs will only light up if the current is flowing in the correct direction, so, if it doesn't light up you may have your wires backwards.

10) If you strips light up correctly reinstall the lens and needles to the main cluster. See step 7 of cluster disassembly. Make sure that the loose red and black wires from your LED strip is hanging out the back on the left side.
11) Now is the time to change your bulbs to LEDs, if desired. You can replace these bulbs with LED's in whatever color you like EXCEPT the three bulbs on top that cannot be changed or they will not work, they are your turn signal and high beam lights; the low fuel warning light cannot be changed either or it will not work. You may need to use your needle nose pliers to twist out some of the old bulbs.
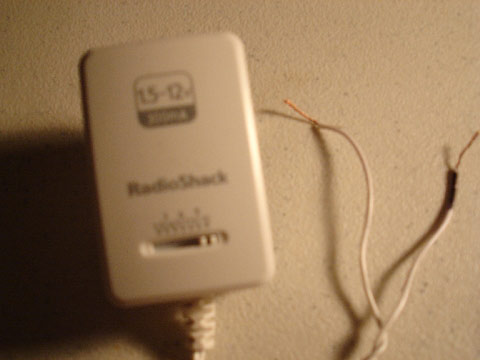
12) Notice: When you remove a bulb the socket is split into two halves, the bottom half is positive (the turn signal bulbs represent the top). The LEDs have two little terminals. One is negative and one is positive, the positive terminal must rest on the lower half of the circle socket or it will not work. What I did to find out which was the positive terminal of the LED was use a 12 volt adapter shown here, cut off the plug at the end and marked the positive wire with a black marker which normally is the only one with a strip or writing on it. Then I tested the LED to see which terminal is positive so I could screw them in the right way. Replace all bulbs you want with LEDs keeping in mind that if you have a blue colored plastic piece (step 5) you will want a blue colored LED. AGAIN: If you don't screw the LEDs in the correct way they will not function!
13) Now that the LEDs are in place, discharge yourself and pick up your power supply. Hold it right over the new LEDs you just put in as though you were about to put it back together. You should have two wires sticking out on top of the power supply and two wires running up the left side of your cluster. Don't run the wires on the back of the cluster along the edge but in that little groove practical brushing the connector that goes to the odometer light.
14) Use your best judgment on how much wire you need to safely connect the wires from the cluster LED strips to the wires you soldered to the power source. Solder the corresponding colors together, black to black and red to red. You will want to twist the wires together and then solder for the best bond. Wrap the joints with a little electric tape. Now connect all the connectors and reinstall the power source unit.
15) Reinstall the 2 back covers and flip the cluster over so that you are looking at the needles. Make sure your tachometer and speedometer are on zero, if they are not on zero take your finger and gently move it back and forth until they are both on zero. Do not do a 360 spin with these needles. Hold the cluster up as though it were in the dash to see if the needles are right on zero. Gas and Temp gauges don't matter.
16) Reinstall your odometer and put the little cover back on it if you removed this. You can also put a LED in the odometer portion of the cluster. Clean the tinted cover with windex, let dry, and then reinstall the cover.
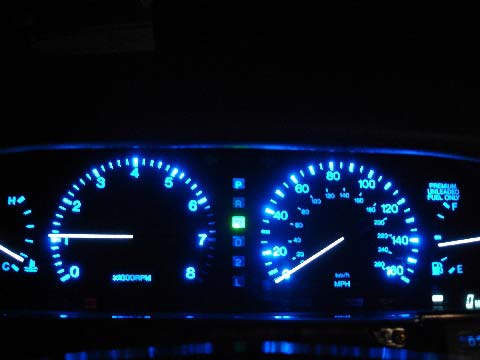
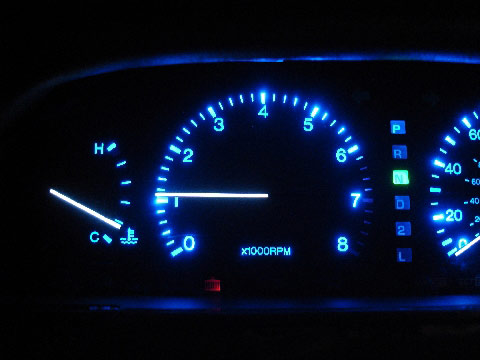
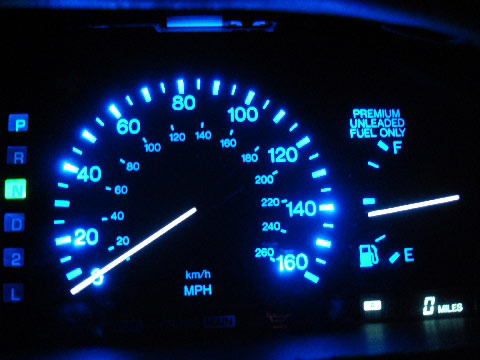
17) Reinstall the cluster in your dash. Make sure the key is not in the ignition and reconnect your battery. Start your car and marvel in your new cluster lighting.
You're Done, Congratulation.
If you found this information useful please support the site by clicking the button below and making a donation. Thank you.
